
How to Install Tile Backsplash
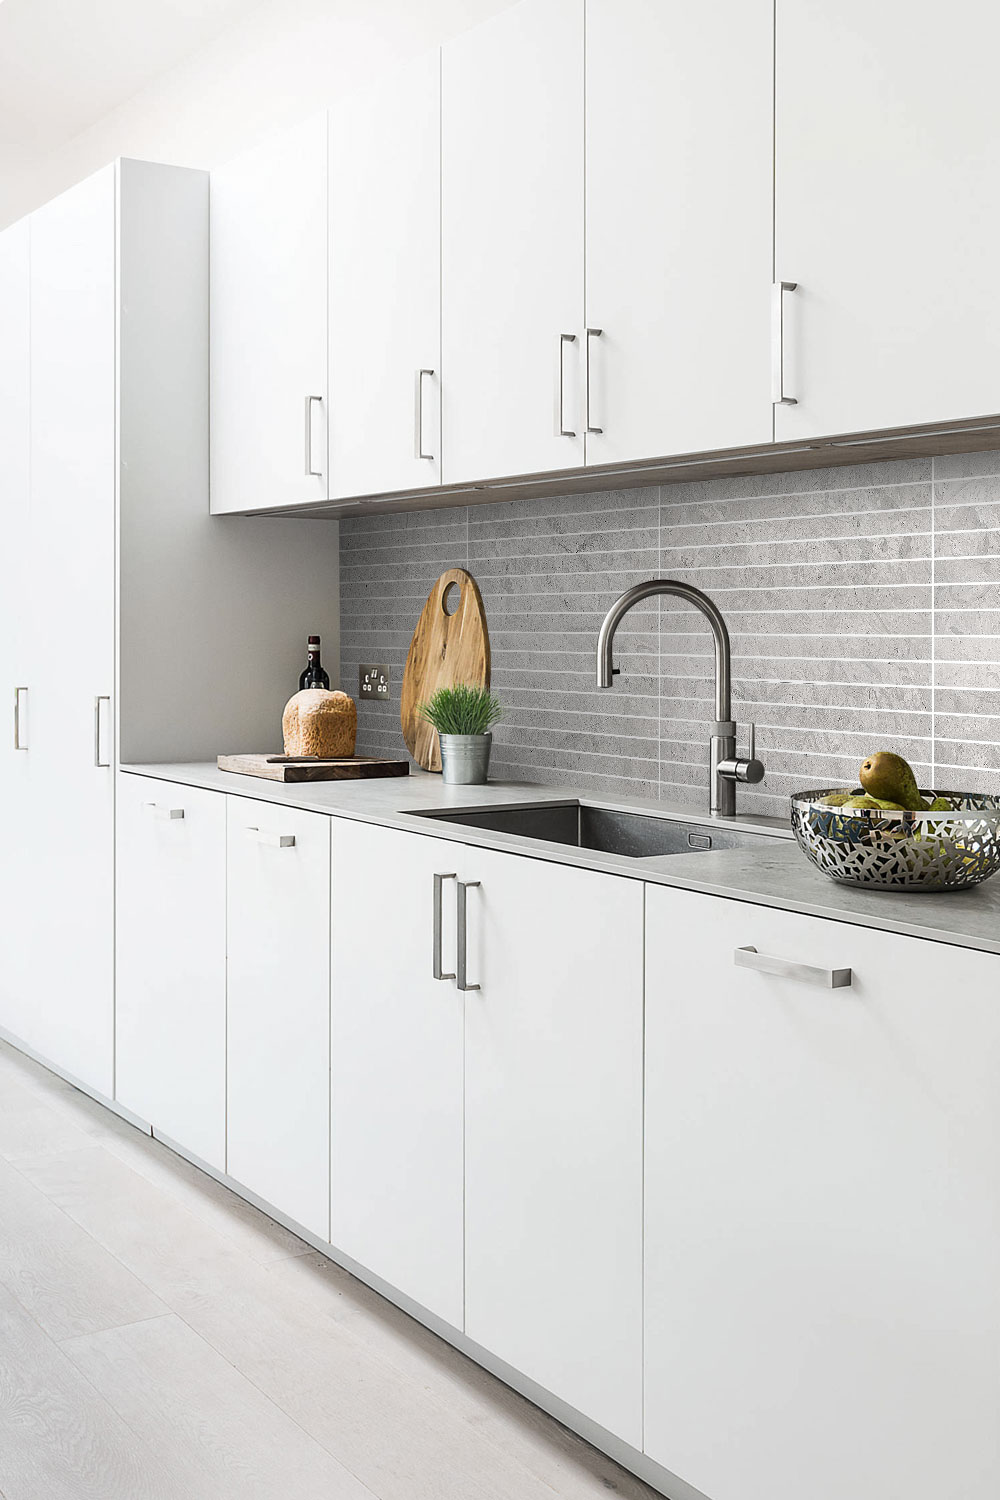
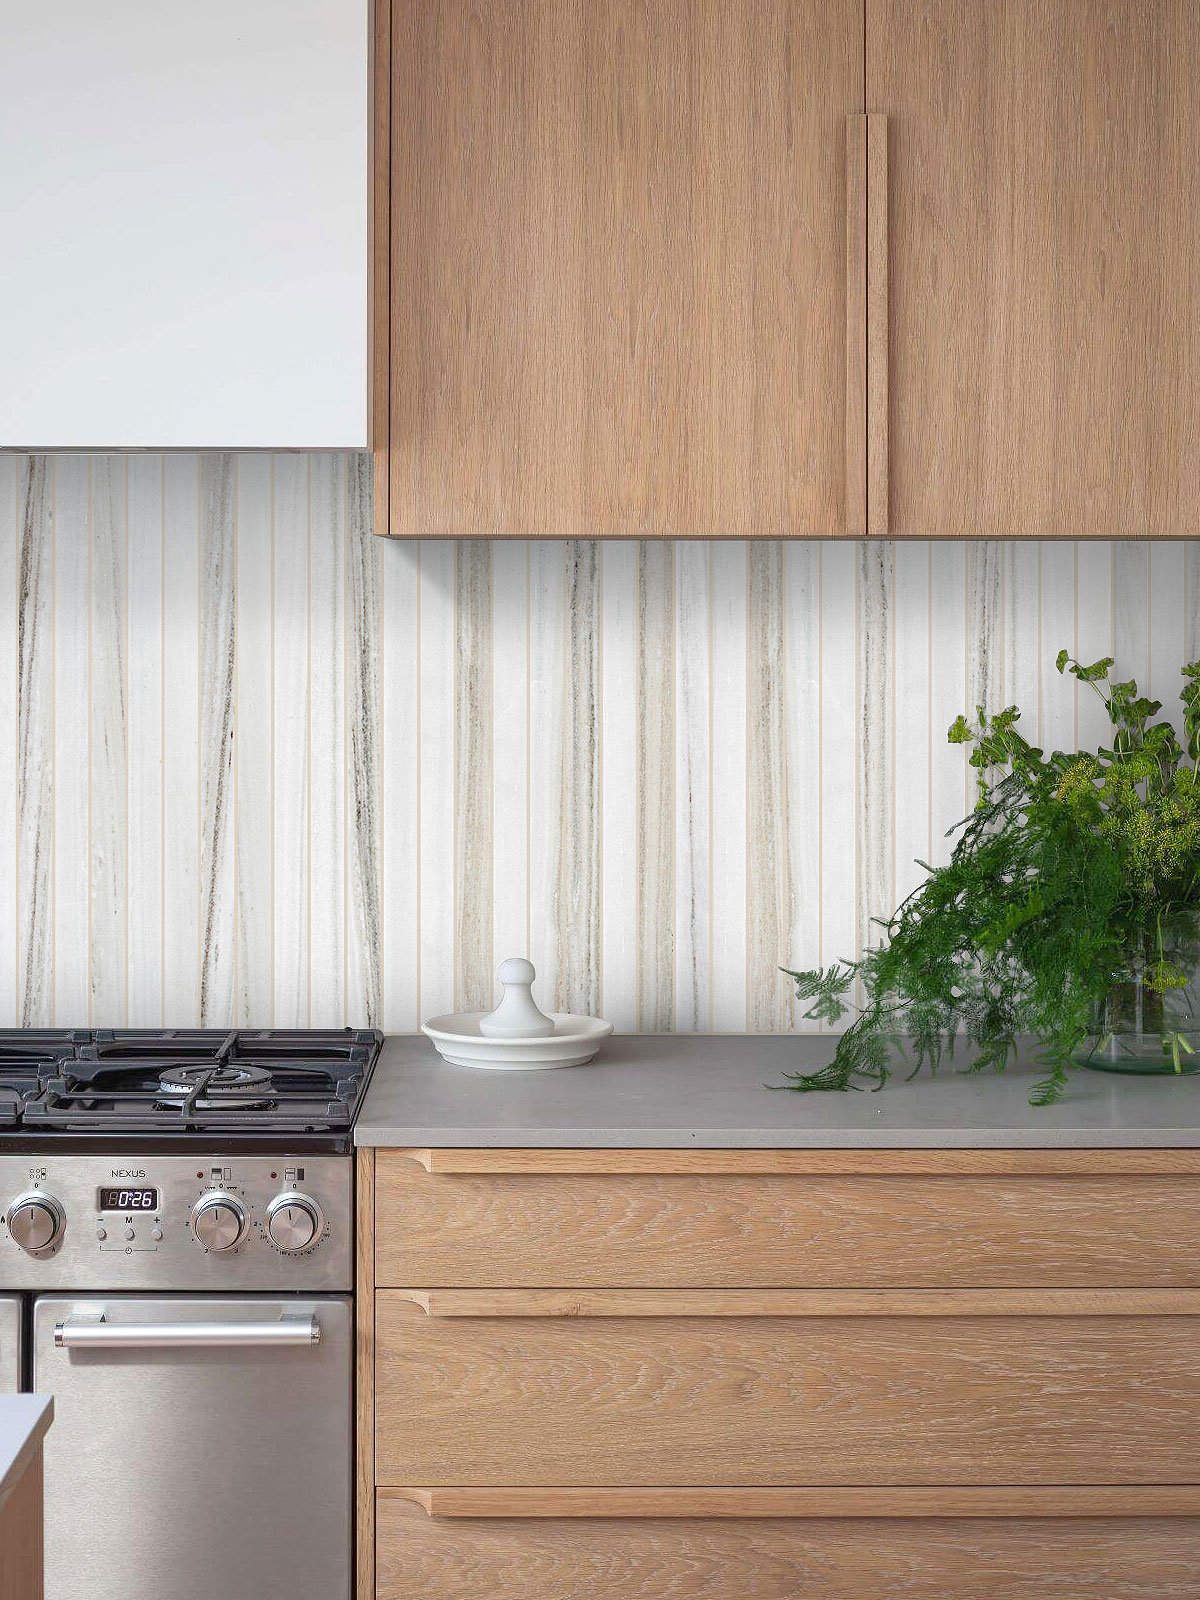
ID# 179202 – Product BA1038 – Modern Long Gray Limestone Backsplash
Modern Gray Limestone Backsplash Tile
With the sleek and elegant appeal of this gray limestone backsplash, you can bring a modern flair to your kitchen! It can be laid both vertically and horizontally, and with its long and slim shape, it is perfect to enhance the space feel. The fresh look of the white cabinets and countertops is a stunning pair for this modern gray backsplash.
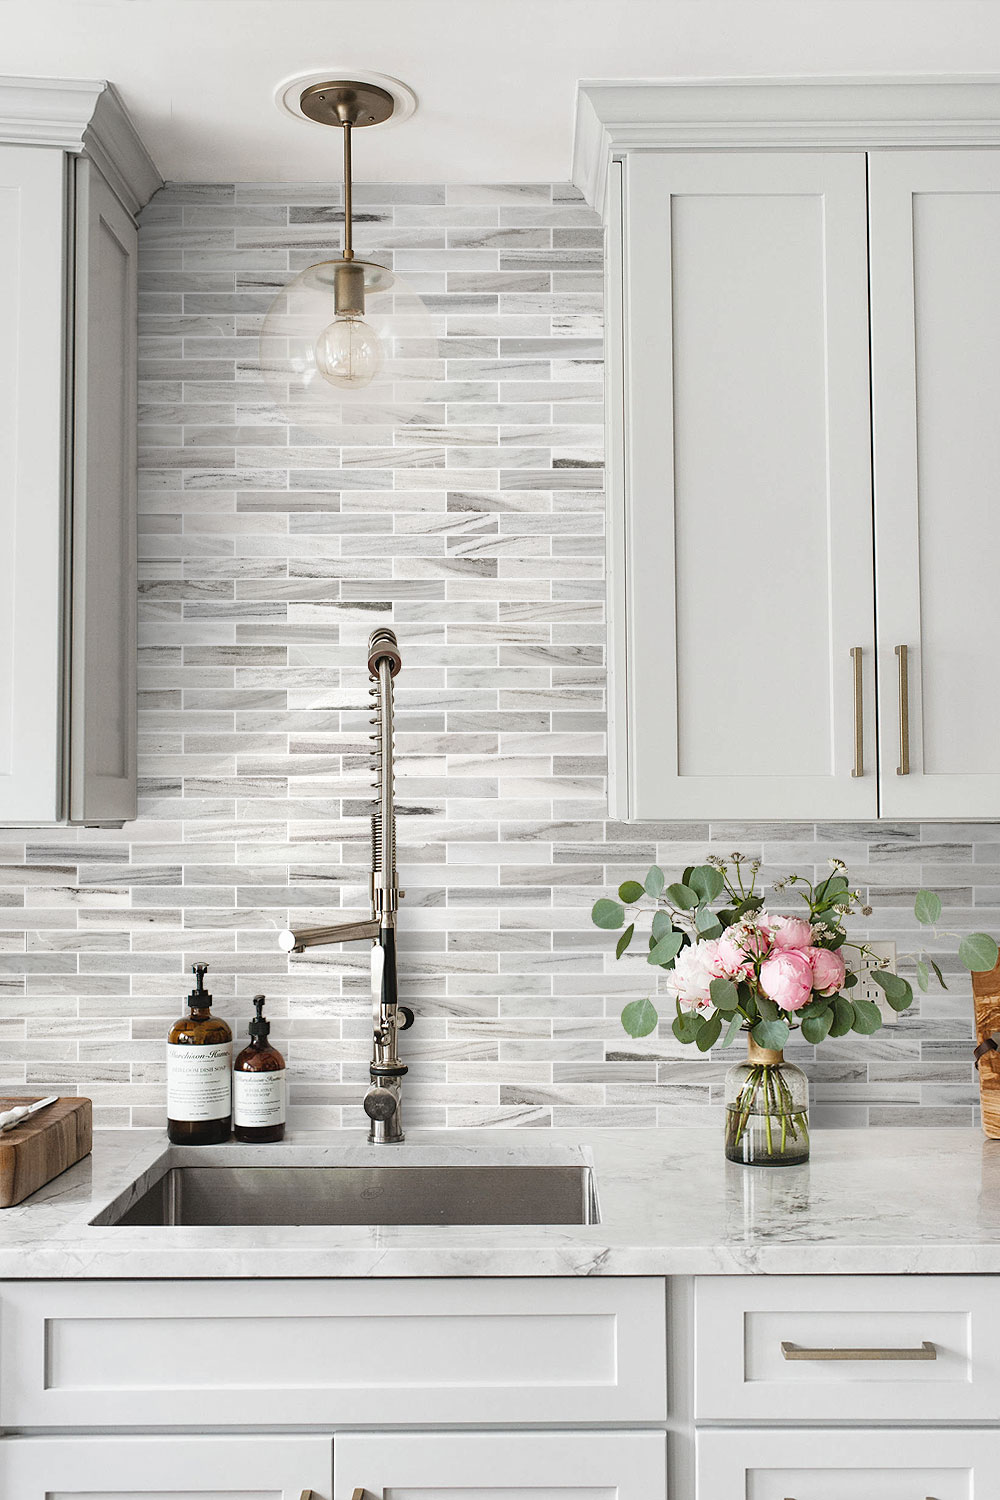
ID# 179206 – Product BA1034 – Modern Marble Subway Backsplash Tile
Modern White & Gray Marble Subway Tile Backsplash
Looking for timeless elegance with a sense of luxury? Our marble subway tile backsplash is exactly what you need! Using this elegant backsplash for a white kitchen with white cabinets, marble countertops and brass accents offers a timeless appeal.
How to Install Tile Backsplash?
If you are designing or renovating your kitchen, you need to think about the backsplash at some point. Just like the cabinets and countertops, a kitchen backsplash is one of the most important features that can affect the overall look. Whether you are designing a new kitchen or want to bring a fresh look to your cooking space, tiling a backsplash is one of the easiest ways to give a whole new look to your kitchen. From ultra-modern metal tiles to luxurious natural stones, a tile backsplash can instantly add depth and style to your kitchen. Once you have decided on the tile that you want to use in your kitchen, now it is time to learn how to install a tile backsplash!
The question you might ask yourself is whether it is possible to do the backsplash installation by yourself. The installation of the backsplash is an easy job. The possible recommendations that this article offers pertain to the installation of a tile backsplash, which is quite convenient and simple in a sense. You can easily and correctly install a new tile backsplash in your kitchen by following these steps!
Tools and Materials You Need
Before starting the installation, you need to supply the following tools and materials.
- Tape measure
- Level
- 4-in-1 screwdriver
- Bucket
- Utility knife
- Cutting Tool ( According to your tile material)
- Tile
- Notched trowel
- Grout
- Grout Float
- Grout Sealer
- Tile Sealer ( Optional )
- Adhesive
- Caulk
- Caulk Gun
- Tile Spacer

ID# 179201 – Product BA62046 – Glass & Marble White Diamond Mosaic Kitchen Backsplash
Glossy White Glass & Marble Diamond Mosaic Backsplash Tile
No matter how you choose to jazz up your kitchen, incorporating the right design elements can easily enhance the overall look and transform your space into one you’ll enjoy for many years to come! And if you are looking for a white tile with a glamorous appeal, our white glass & marble diamond mosaic tile backsplash will add a dazzling look to your kitchen.
Where do you start when tiling a backsplash?
Defining the starting point is one of the most important steps for how to install tile backsplash. While installing a backsplash is an easy job, many homeowners don’t know where to start tiling a backsplash. There are several methods to determine the starting point. The most common method is start at the center point. This way keep the lines symmetrical and even while installing tiles. You can use this method for classic subway tiles as well as larger tile sheets. On the other hand, some tile patterns work best when centered on a focal point like a stove, faucet, window, or sink. So, before deciding on the starting point, you need to consider different methods and find which one is the most suitable for your tile design.
Is tile backsplash easy to install?
Kitchen backsplashes are important elements that can really change the overall look of the kitchen. Even though it seems a difficult job, installing a tile backsplash is not that hard. When you have decided on your project, you can install your tiles by following the guide that we prepared for you about how to install tile backsplash.
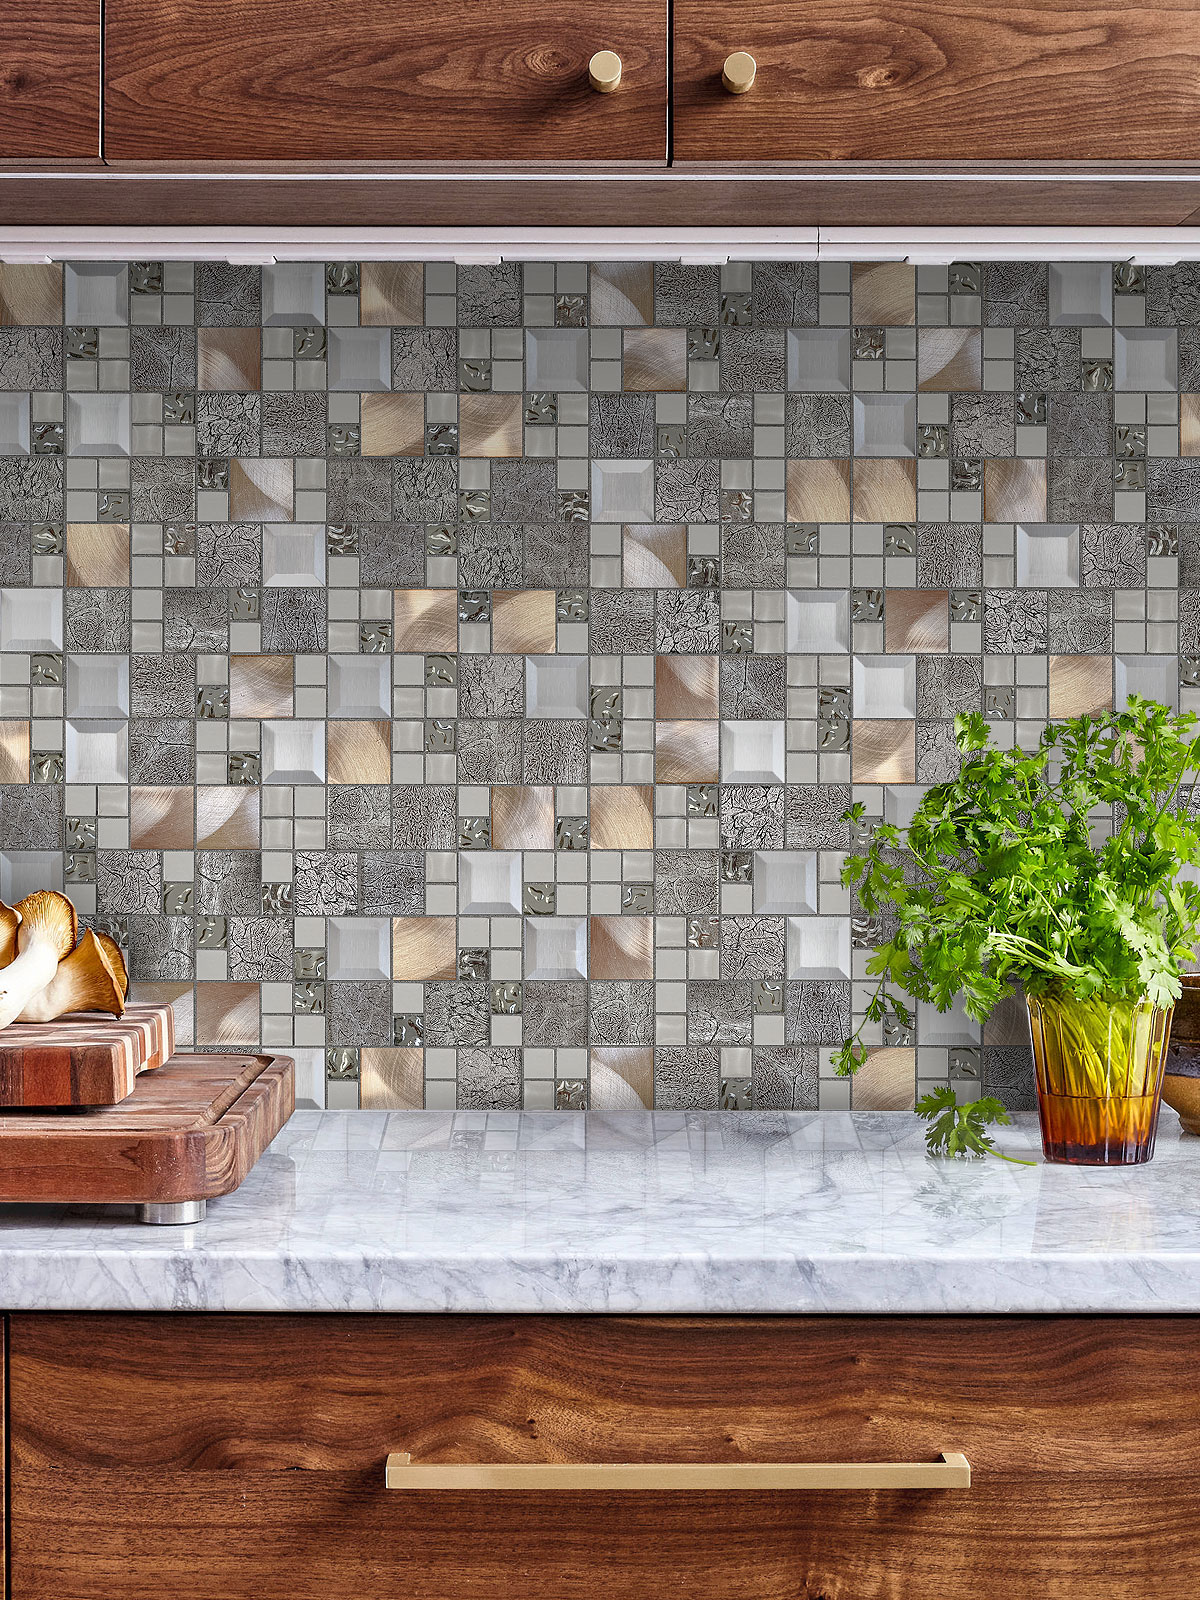
ID# 179203 – Product BA62010 – Glass & Metal Mosaic Kitchen Backsplash Tile
Multicolored Glass and Metal Mixed Mosaic Backsplash Tile
Bored of classic backsplash designs? With its glamorous appeal, our glass and metal mosaic backsplash can easily give you the wow factor that you want! Balancing the warm copper and cool gray shades, this modern mosaic backsplash acts as a piece of art. Neutral shades like brown, black, gray or white will be a great pair for this mosaic!
How much does it cost to install a tile backsplash?
The total cost may vary involving the installation of the tile backsplash in your kitchen based on the scale of your project, the materials for tile manufacturing to use, and also where you are located. Generally, you can expect to pay between $900 and $2500. By doing your own backsplash installation process, you can eliminate the labor cost on both materials and services. If you are on a budget, you can also opt for affordable tile materials like ceramic or porcelain.
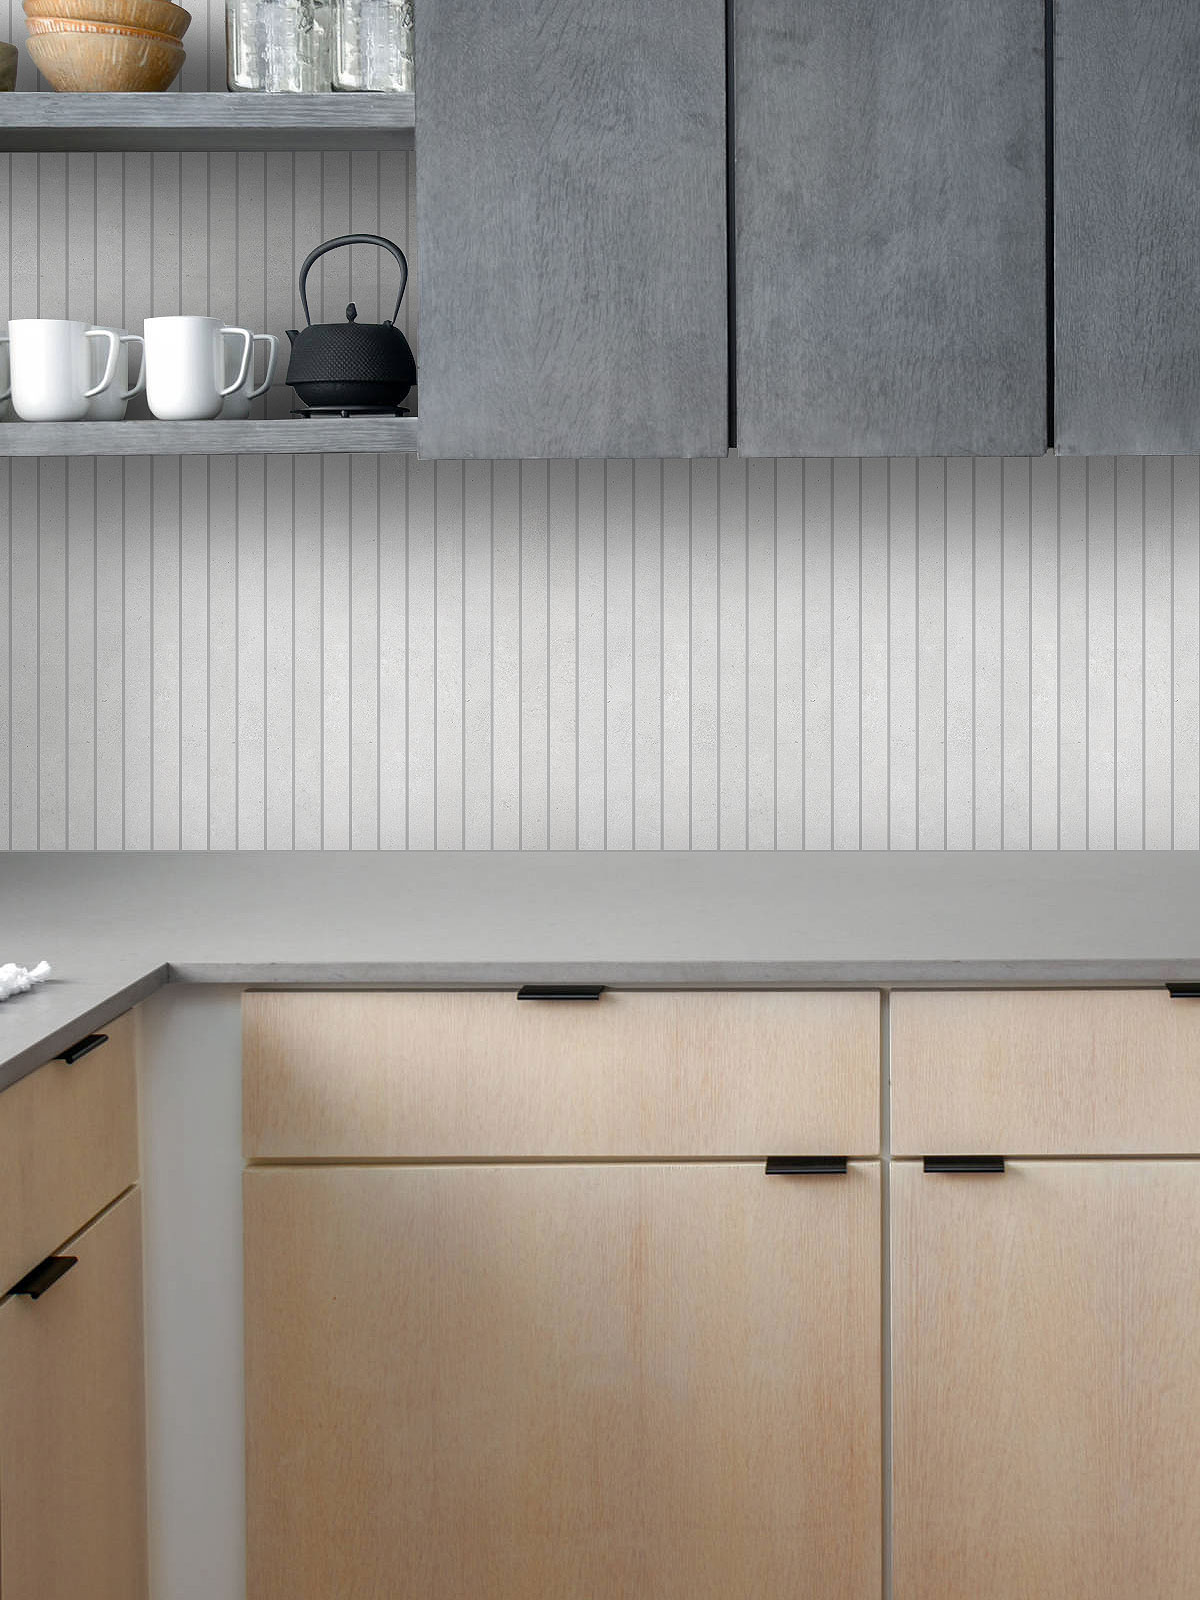
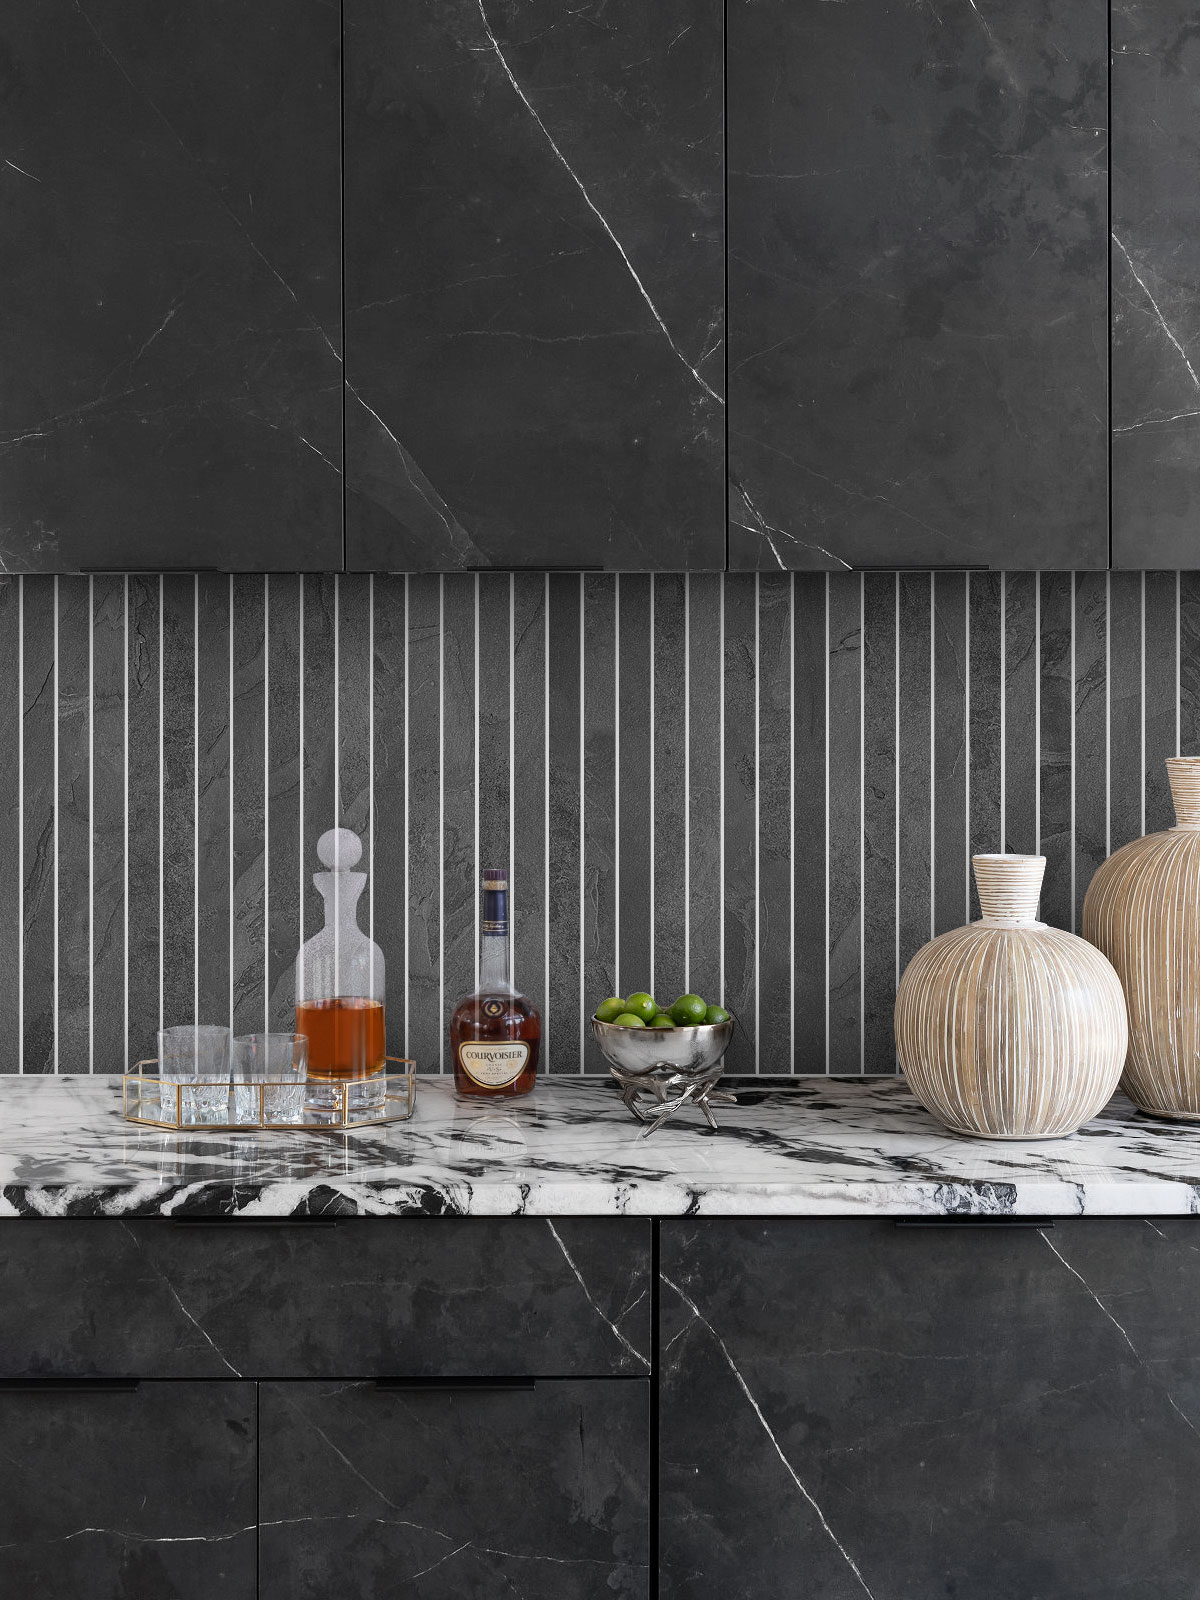
ID# 179204 – Product BA4502 – Modern Long Light Gray Porcelain Backsplash Tile
Modern Light Gray Porcelain Kitchen Backsplash Tile
Are you looking for a modern kitchen backsplash? Give a timeless feel to your home with the simplistic beauty of these honed porcelain tiles! Our modern light gray porcelain mosaic tile offers a sleek and elegant look for kitchen and bathroom projects.The sleek and minimalist design of this modern gray backsplash can easily work with a variety of design styles whether paired with subtle touches or equally bold elements!
Can tile be installed over painted drywall?
The brief answer is yes; you could use tiled walls over drywall. Nevertheless, before the installation, the lining plates should be pre-planned on every abstract surface since painted surfaces are always glossy. Therefore, if you try to glue this glossy plane sequence, the adhesive will not be held. As such, you will stripp and stink the painted drywall and repair the cracks as well as dents on it with dry wall joint compound so that you may get an even surface for installation.
Do you grout between countertop and backsplash?
Grout is a durable material that extends the like of tiles. However, the edge of the backsplash and countertops need a more flexible material than grout. That’s why you need to caulk this gap between the backsplash and countertop.
What is the best adhesive for a backsplash?
The adhesive for the tiles must be strong, durable, and easy to apply. For kitchen backsplashes, there are mainly two types of adhesive: mastic and thinset mortar. But which one is right for your backsplash?
Thinset mortar is an inexpensive material that can be used in very wet areas. You can find the thinset mortar in different forms, such as wet, pre-mixed, or powder form. It is a stronger material than mastic but it is a slow-setting material, which can cause tile to sag on vertical applications. But don’t worry about it, you can solve his problem with tile spacers.
Mastic is an organic tile adhesive that can be used for only drywall applications. It is very sticky and reduces the tile sag on vertical areas. But it cannot be used in high-moisture areas.
So, both materials are suitable for the application of a kitchen backsplash. However, they are not suitable for each type of tile. For example, glass tiles require special materials, and for a successful installation, you need to use white, latex-additive thinset mortar.
Install Tile Backsplash Step By Step
01- Calculate How Much Tile You Need
When installing a backsplash, first you need to measure the walls and determine the square footage. The square footage will determine how many tiles you need for your project. If you will do the measurement right, this will help you to keep tile installation costs down. To find the square footage, multiply the width and height of the backsplash area and divide by 144 to convert the result to square feet.
If you are working on walls with disproportionate sections, you can divide the area into sections, multiply the width and height of each section and sum the results. Also, don’t forget to add %10-%15 percent to your final result. Because, according to your tile type or the backsplash area, you may need to cut some tiles or there might be some damaged tiles.
02- Prepare Working Area
Before the installation, you need to prepare the surfaces. Move the appliances from the counter. To protect the countertops, place a cardboard board or cloth and secure it with a painter’s tape. Also, you can cover the countertops with a plastic sheet. Then turn off the power to the kitchen and remove the outlet covers and switch plates. Define the boundaries with a painter’s tape.
03- Clean Walls
To achieve a proper installation, you need to prepare the walls and create a uniform surface. If there is a tile on the walls, first you need to remove the tiles and the adhesive underneath and fix the drywall. To learn more about it, check our ‘How to Remove Tile Backsplash’ blog.
If you are installing tiles on a bare wall or drywall, first you need to patch the holes and smooth the surface with sandpaper. Then clean the wall surfaces with mild soap and water and allow the surface to dry. If there is any stain or grease on the walls, you may need to use a primer first.
04- Plan Tile Layout
When you are working with tiles, it is important to define the layout of the tiles before the installation. This helps you to achieve a perfect look and ovoid unmatched corners and unfilled blanks. Also, you can find the tiles which need to be cut. Place the tiles across the wall and mark the start and endpoints. You can also lay the tiles on the counter to define the layout. Determine the tiles that you need to cut.
05- Cut Tiles
For proper cutting, you need to supply a proper cutting tool according to the material of your tiles. For example, if you are using ceramic or porcelain tiles, a simple tile cutter can do the job. A glass cutter can be enough for glass tiles. Using a wet saw with a diamond blade will be the best option for natural stone tiles. If you want to achieve a perfect result, you can use the wet saw for all materials. However, this equipment is expensive and if you will use it for just one time, you can consider renting options.
06- Prepare Adhesive
Mix your thinset or tile adhesive with water in a bucket. For the right amount, follow the manufacturer’s instructions.
07- Install New Tiles
Apply the adhesive with a notched trowel in small sections. Applying it in small sections will avoid drying. The size of the trowel depends on the material. Spread the adhesive with the trowel and press at a 45-degree angle. Texture it with the notched side to create a proper surface. Then place the tiles on the adhesive and press on them with a trowel. Do these steps until cover all the backsplash area. Allow the adhesive to dry for at least 24 hours.
08- Apply Grout
Once your tiles are set, it is time to grout. The grout type depends on the material and the size of the grout lines. For the smaller grout lines, 1/8-inch non-sanded grout is a great option. If you have larger grout lines from 1/8 inch you can use sanded grout.
Mix the grout according to the directions. Apply it with a grout float and press it to fill the grout lines by using 45-degree angled motions. Once you have filled all the lines, wait 10-15 minutes and wipe the tile surfaces with water and a sponge. Then, allow the grout to dry. It is better to check the directions to find how long you need to wait.
09- Seal Grout
Once the grout is dried, now you can apply a grout sealer according to the manufacturer’s instructions. For the application, you can use a clean cloth or brush.
10- Caulk
Caulk the area where the backsplash meets with the counter to reduce staining.
11- Final Step
For a final step, replace the electrical outlets and the appliances on the counter. Now you can enjoy your brand new backsplash tiles!
If you are using natural stone tiles, some of them come without sealing. So, you may also need to seal them. To learn that you need to seal your tiles, you can contact your stone supplier.
ID# 179205 – Product BA1080 – Modern Rosewood & Gray Marble Backsplash Tile
Modern Rosewood and Gray Long Marble Kitchen Backsplash
Subway, chevron, herringbone, hexagon and even arabesque are popular tile shapes for marble material. But if you are looking for something new, you will be amazed by our modern long marble backsplash tile! As striking as it is understated, the modern marble backsplash tile combines rosewood and gray hues, offering a timeless and versatile appeal for wherever it is installed.
Do I need to prime before tiling the backsplash?
If you are installing new drywall, adding a primer will create a protective layer for the walls and stop the gathering of moisture.
Do you need a cement board for the wall tile?
A cement board is not necessary for all wall tile applications. If you are installing a kitchen backsplash, you can install the tiles on the drywall.
ID# 179207 – Product BA1081 – Modern Long Slate Tile Backsplash
Modern Dark Gray Slate Backsplash Tile
Subway tile will always look great, but if you are looking for a backsplash design that can make a statement, our dark gray modern slate backsplash tile will add character and charm to your kitchen decor.
How much space do you need between backsplash tiles?
Grout is a porous material that tends to wear more than tiles. That’s why keeping the grout lines down to around 1/16 inch will extend the life of your backsplash. However, some types of tiles can be laid in with larger grout lines but for these larger gaps, you need to use sanded grout.