
10+ Limestone Backsplash
ID# 137003 | Houzz.com – Credit | © Natural Balance Home Builders
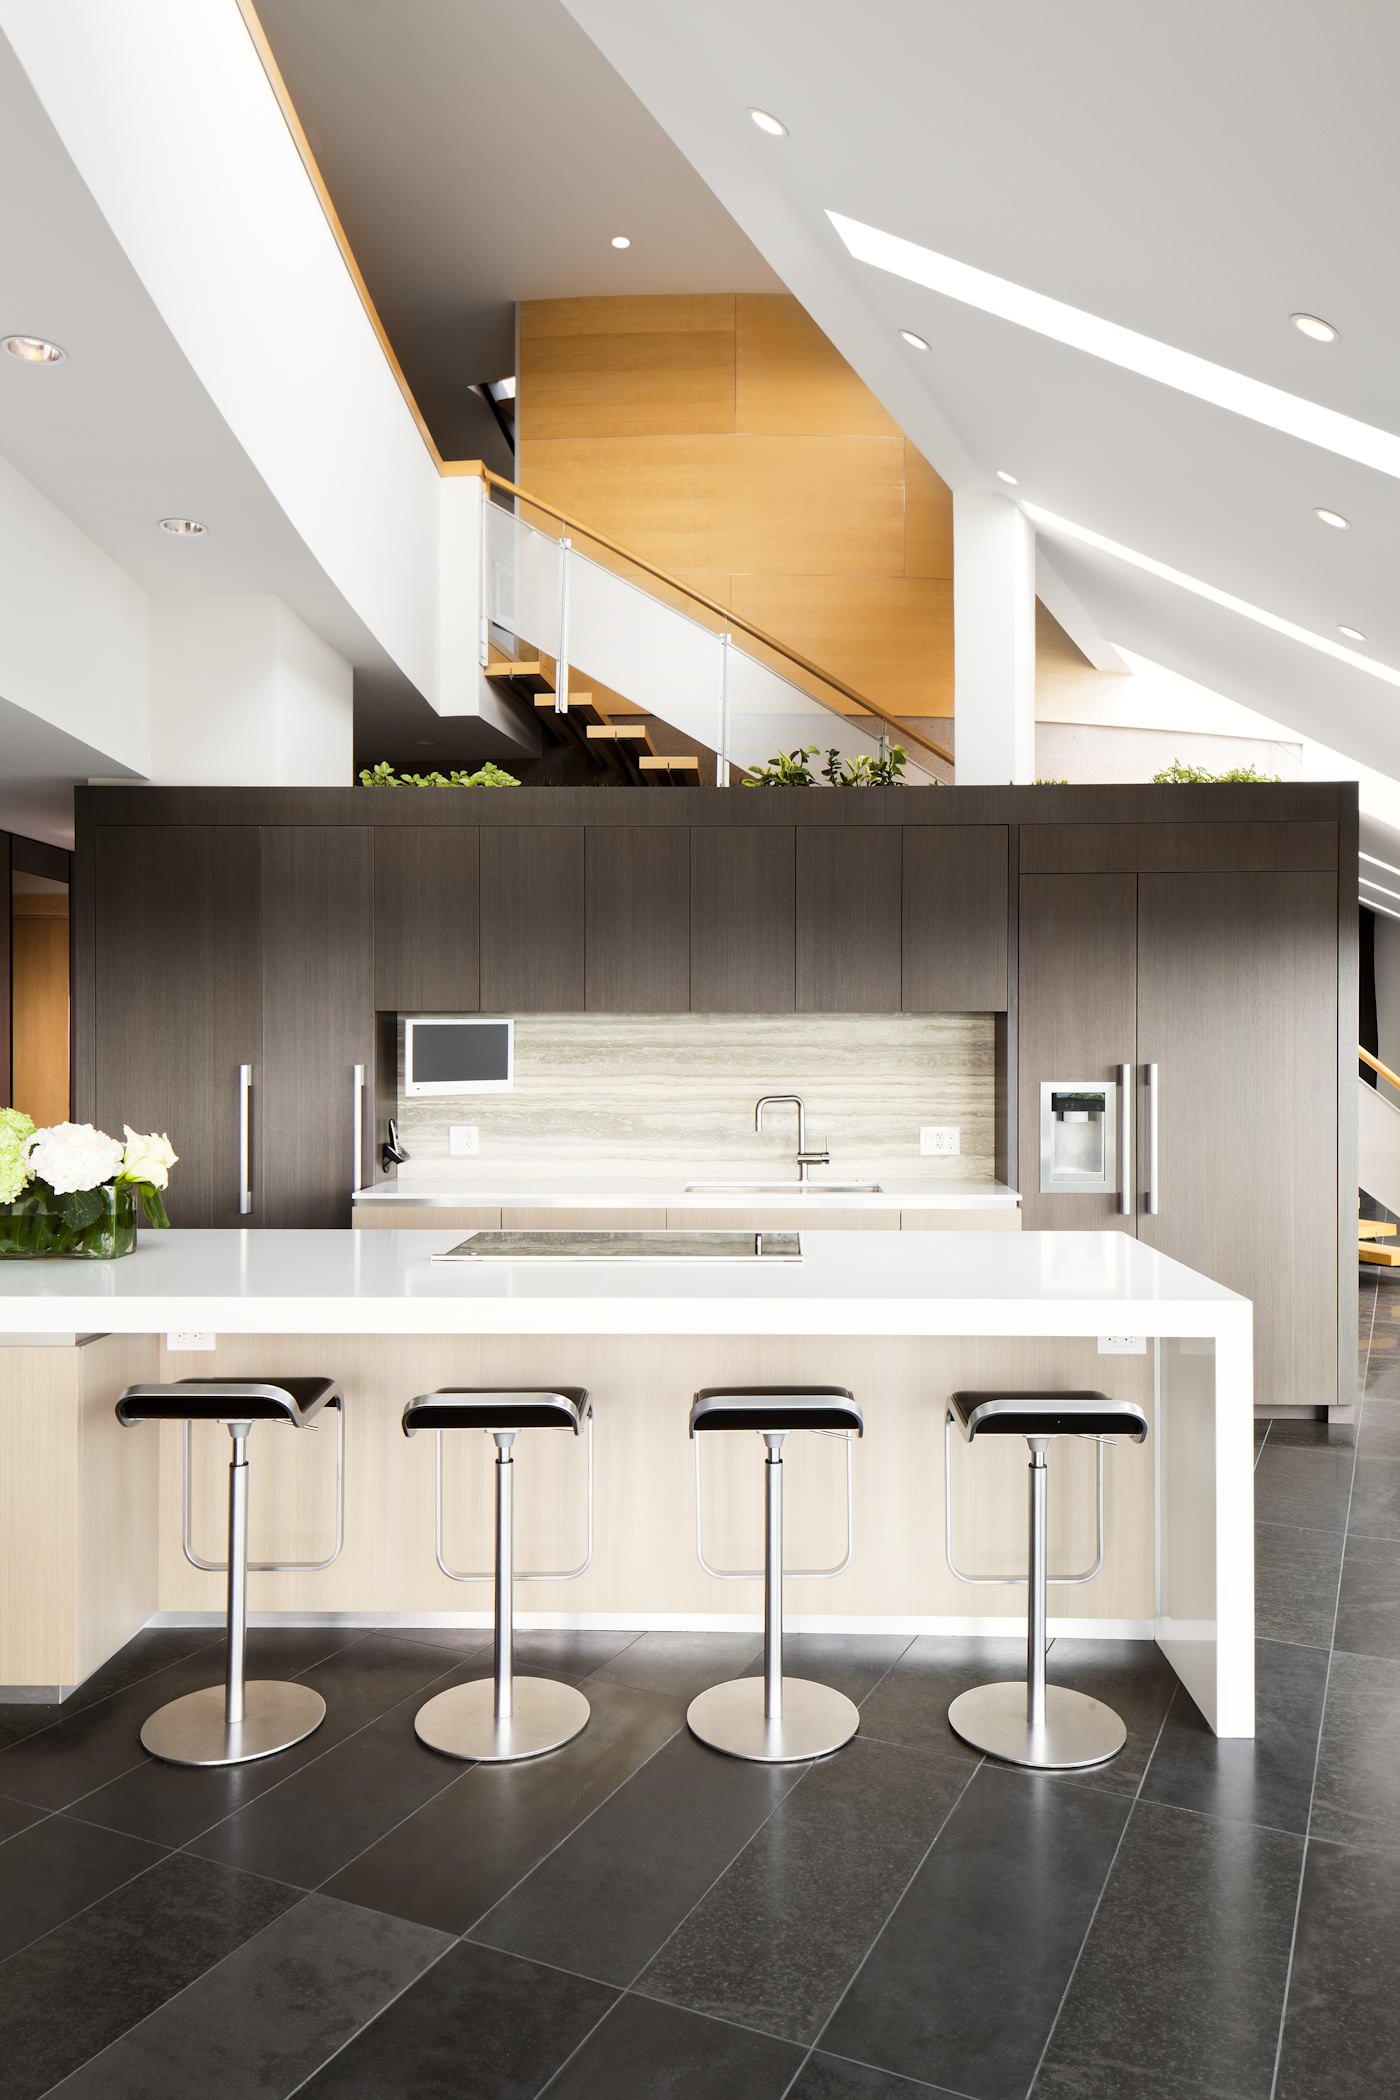
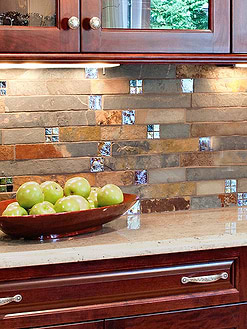
Contemporary Kitchen Design with Dark Wood Cabinets and a Limestone Backsplash
The dark and light colors create a perfect contrast with a contemporary design look! The light wood kitchen island and the dark wood flat-panel cabinets are enlightened by the white countertops, waterfalls, and a limestone backsplash. The color match of the backsplash and the island provide a flawless combination. The black tile floors emphasize the contrast between the dark and light wood cabinets. The kitchen has a bright look thanks to the white countertops and the limestone backsplash.
ID# 137009 | Houzz.com – Credit | © Chris Chapman Bespoke Kitchens & Furniture
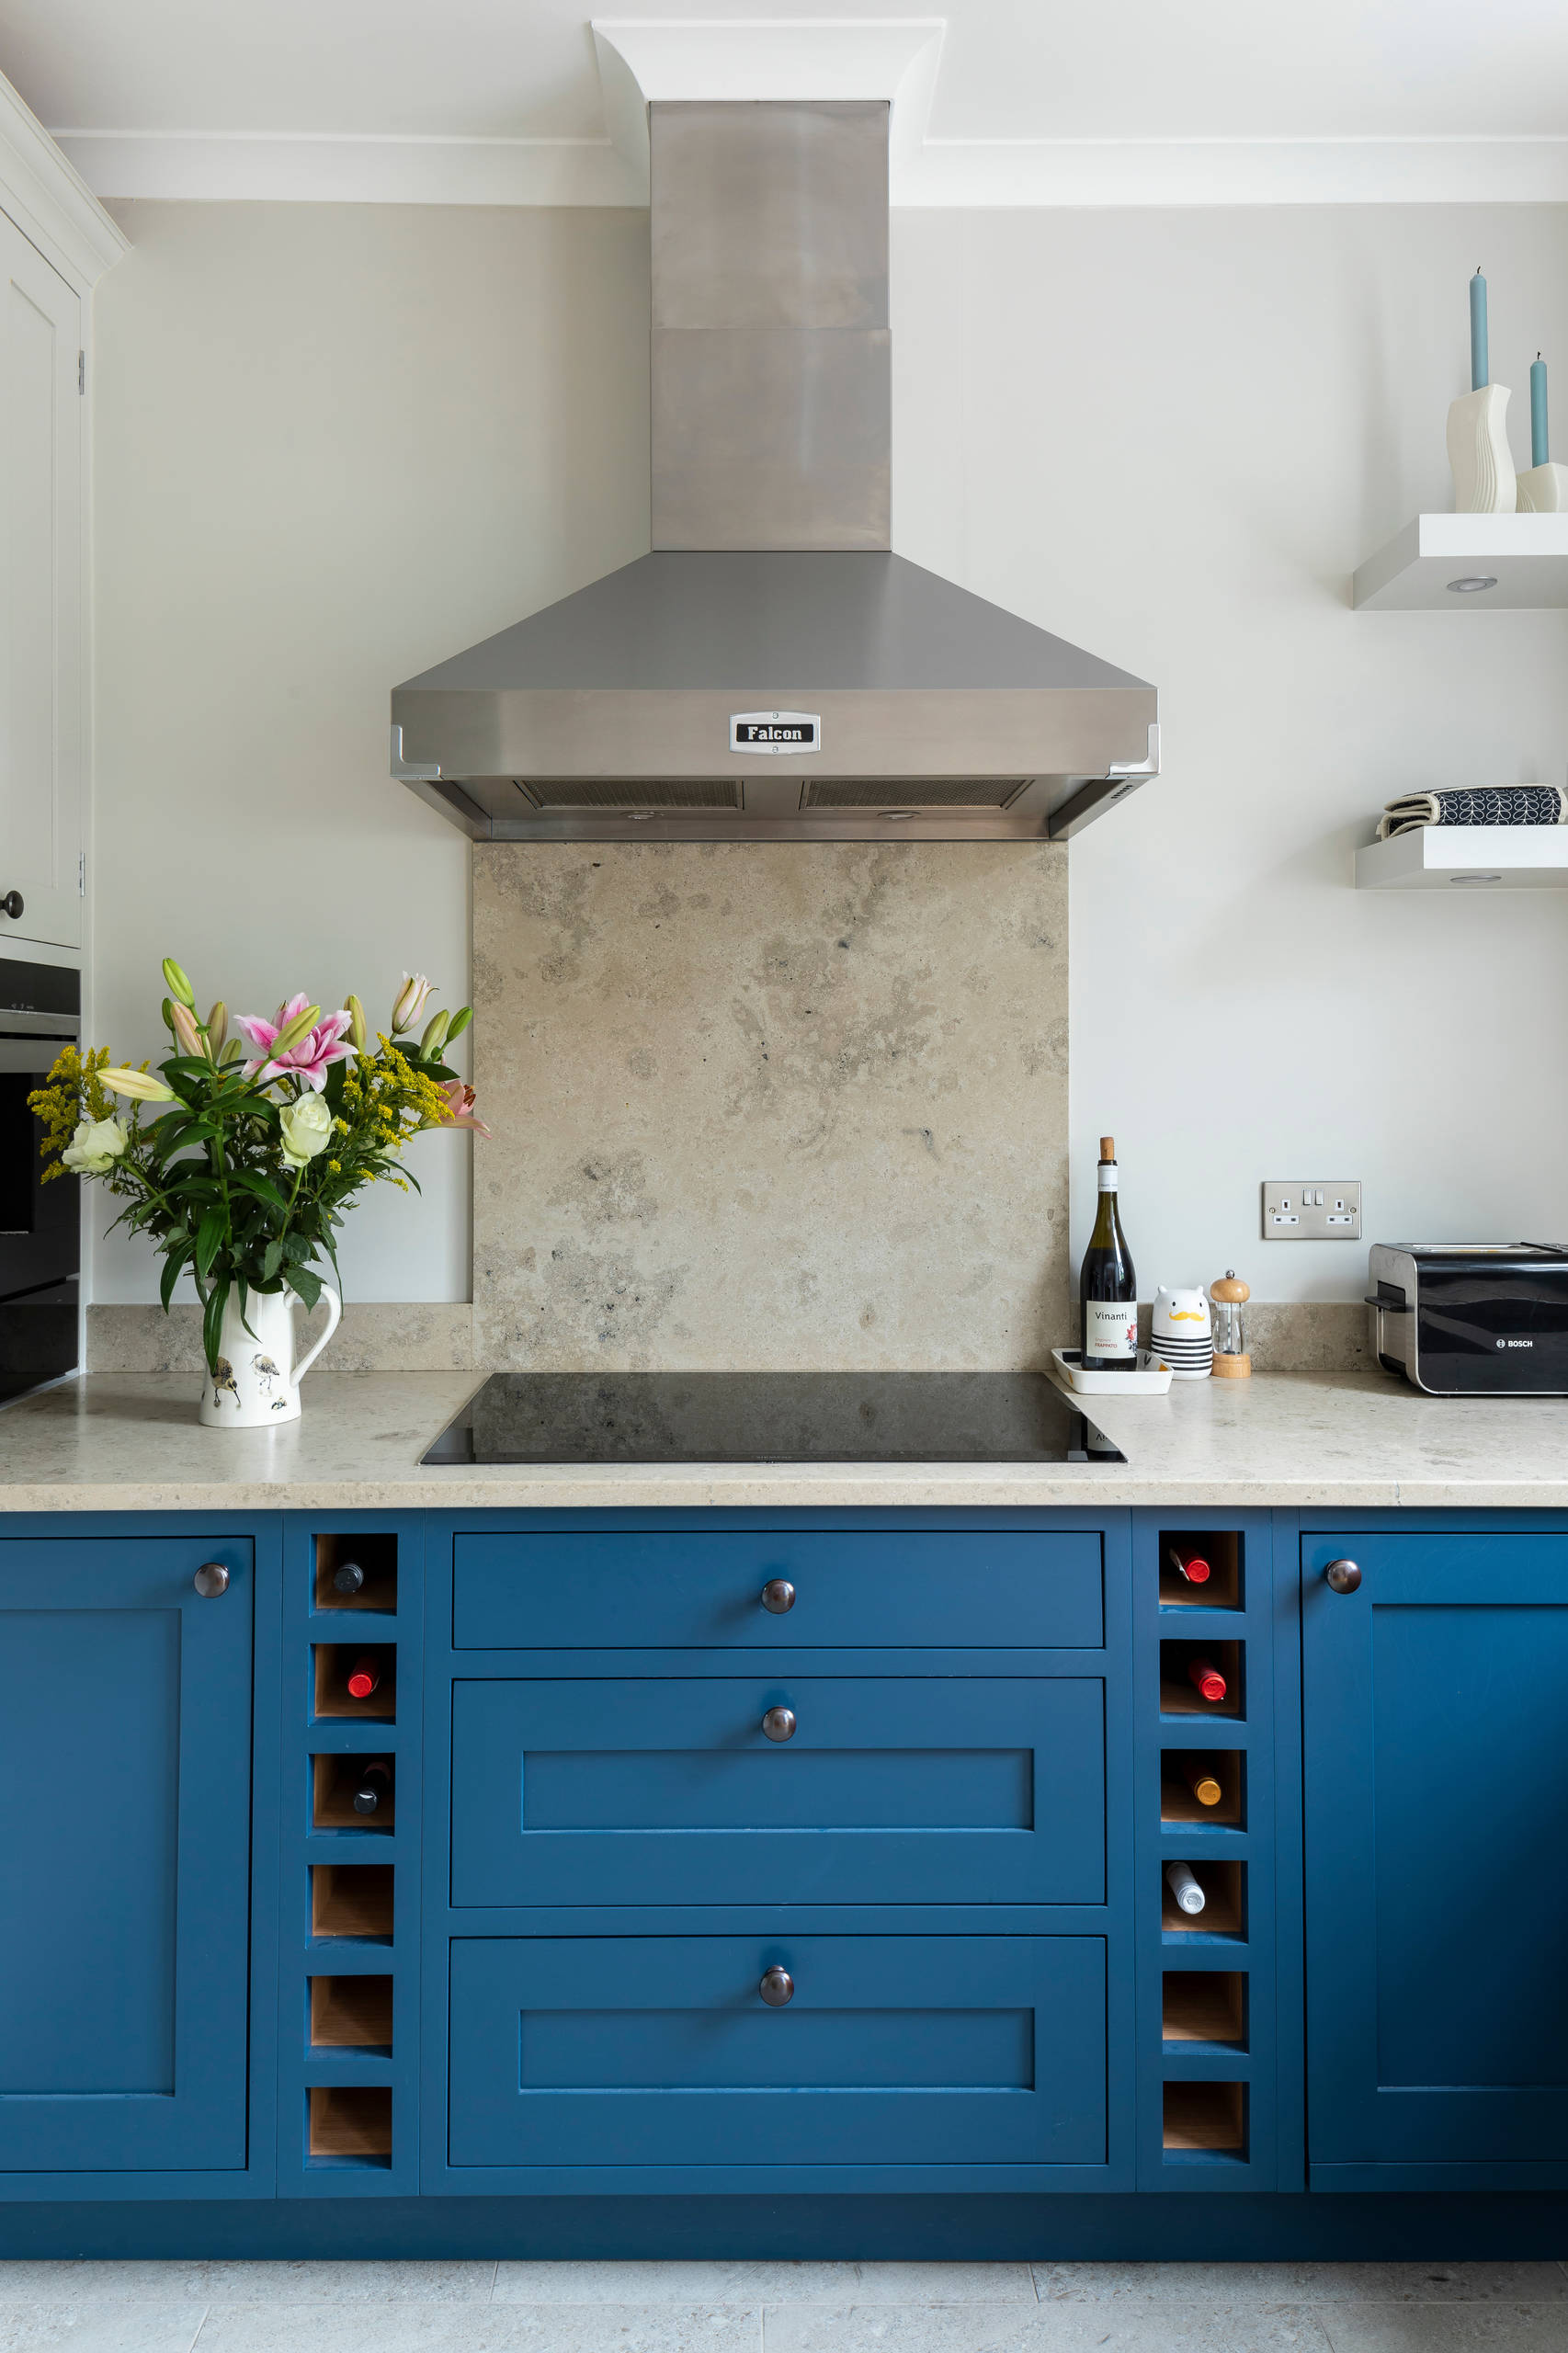
Traditional Kitchen with a Honed Limestone Backsplash and Blue Shaker Cabinets
The contrast between the brown and blue takes the action with a pale sandy hue of the honed limestone backsplash and countertops. The blue shaker cabinets provide a fresh and natural appeal while the stone backsplash and countertops boost this appeal. The chrome hardware and stainless steel appliances modernize the overall look of the kitchen complementing each other. The honed limestone backsplash and the countertops enrich the cabinetry design with a natural look.
Limestone Backsplash
Today, backsplashes are mostly utilized for ornamental purposes rather than only to shield walls in the kitchen from spills. For the backsplashes, several attractive materials are available, including glass, tile, stone, wood, metals, marble, travertine, and granite. A limestone backsplash is one of these alternatives you can go within the kitchen.
From a Sedimentary Rock to a Limestone Backsplash
If you will choose a limestone backsplash design, first let’s understand its ingredients. Calcite and aragonite are two distinct crystal forms of calcium carbonate that are found in limestone, a hard sedimentary rock. The fragmented remnants of aquatic animal shells and living creatures make up limestone. This sedimentary rock is mostly created when marine organisms like mussels, clams, oysters, and forams draw calcium carbonate from the water to produce their shells and bones. When they pass away, their shells and bones fall to the seafloor where they build up over millions of years to form a tough sedimentary rock.
A great material that can be utilized to beautify any room is limestone. Tiles made of limestone are becoming more popular. Tiles, pavers, slabs, and mosaic tiles are among its offerings. Both residential and business spaces may make use of these tiles. They are functional and look beautiful in various kinds of environments. These tiles’ surface veining, streaking, and speckling provide a variety of patterns. Some types of limestone are streaky, while others contain extremely minute specks. The natural beauty of the limestone tiles is enhanced by the diversity of contrasting hues they produce. Different elemental impurities that were present in limestone throughout its development are what cause the wide variety of hues. To use a limestone backsplash let’s see popular hues for limestone tiles including:
-Brown, light brown, tan, and cinnamon
-Orange, rusty, peachy, copper, terra cotta
-Pink, rose, pastel pink
-Golden, sandy
-Charcoal, jet black
-White, beige, off-white, creamy beige,
-Plum, red, raspberry, burgundy
-Gray and light gray
Let’s check some of the perfect design solutions with a limestone backsplash!
ID# 137001 | Houzz.com – Credit | © PlaidFox Studio
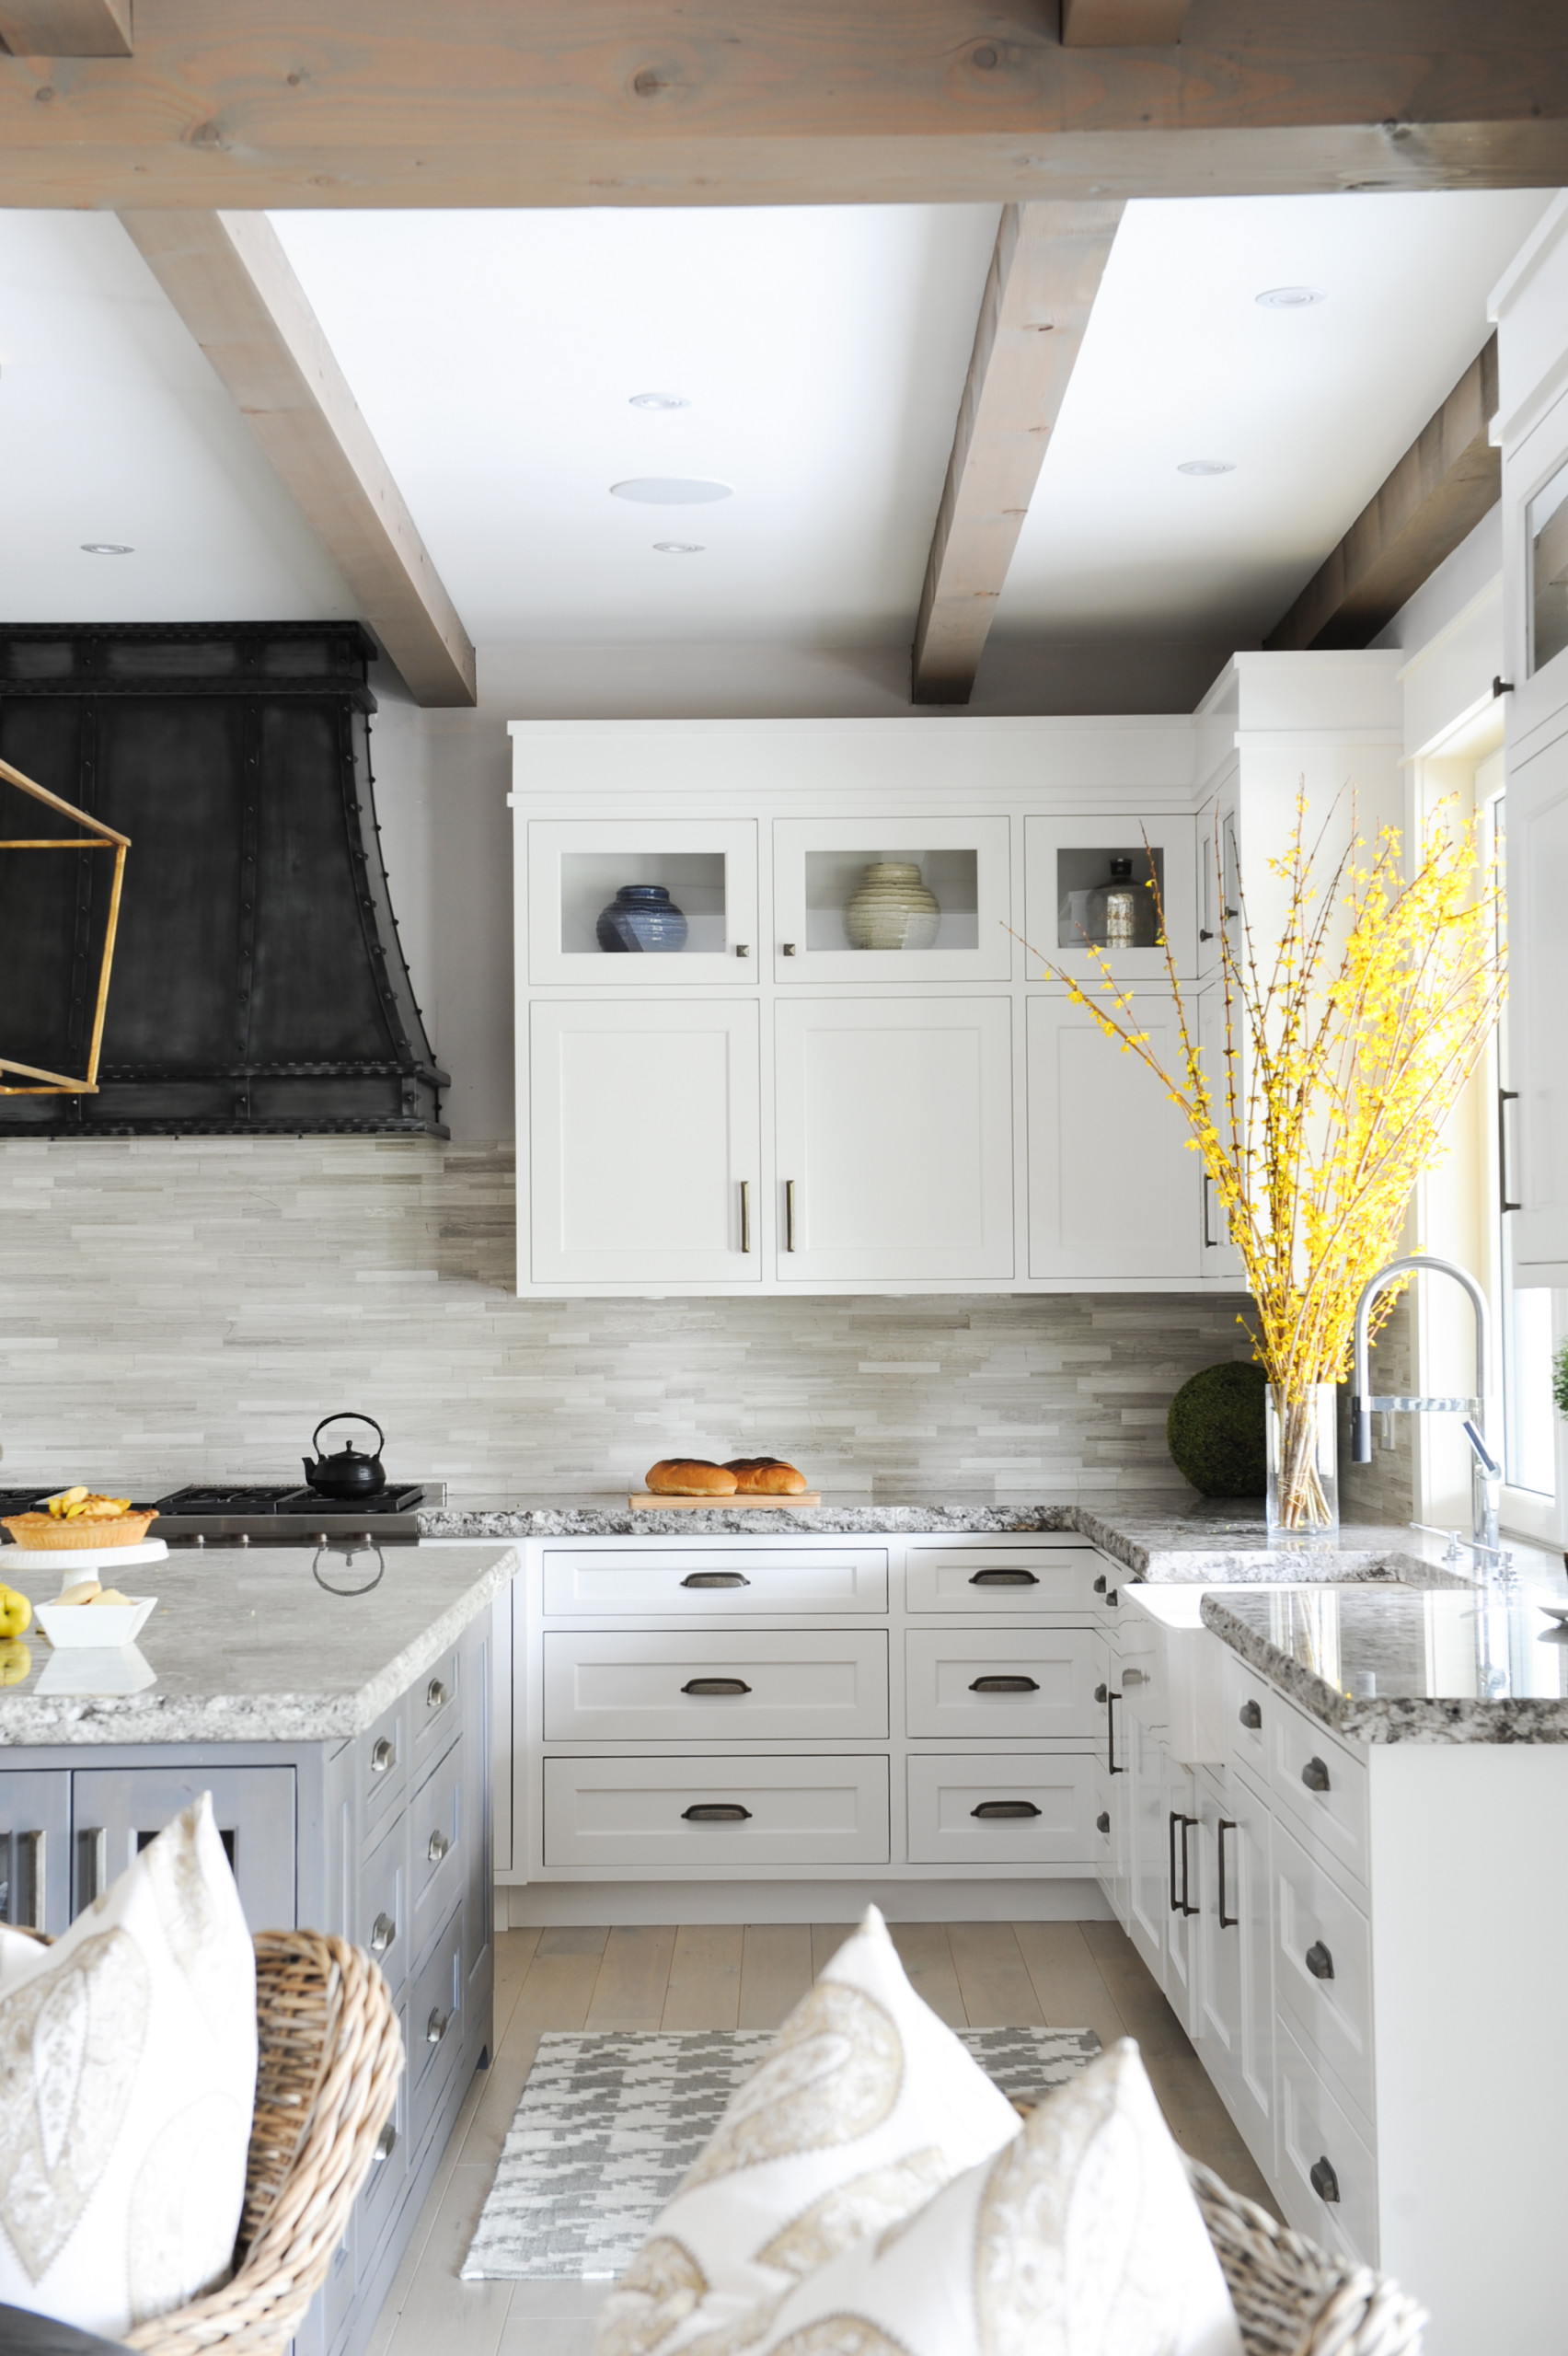
Limestone Backsplash with White Shaker Cabinets for a Country Kitchen
The limestone backsplash and the white kitchen cabinetry harmony look perfect with the gray countertops. The backsplash provides movement and texture to the kitchen’s overall look. The limestone and the exposed wooden beams create a rustic charm in the kitchen at the same time. The gray hardware and the countertops complement the design look with a country style!
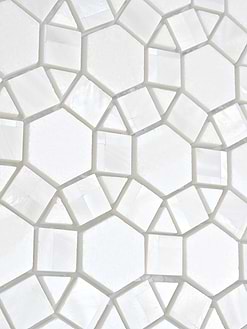
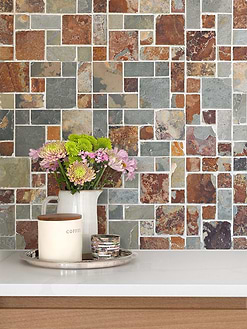
Limestone Mosaic Tiles

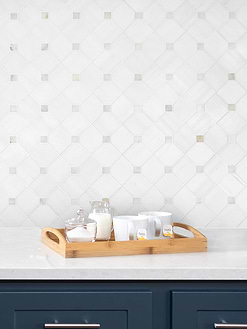
ID# 137002 | Houzz.com – Credit | © Farmer’s Daughter Interiors & Design
Transitional Kitchen Design with White Shaker Cabinets and Black Hardware
The black accents of the kitchen and the hardware complement each other creating a stylish contrast. The white shaker cabinets and the quartz countertops match perfectly with the limestone backsplash. The gray and white tones of the backsplash balance the stark white view of the kitchen adding a neutral and warm appeal. The veins of the countertops and the backsplash harmonizes creating an organic flow in the kitchen’s environment.
Is Limestone good for a backsplash?
You undoubtedly desire a significant kitchen buy to be the ideal complement. Make sure you will be happy with the outcomes before making any changes to your kitchen, such as adding limestone backsplashes. Despite being one of the “softer” alternatives among the various kinds of natural stones, limestone may be a suitable choice for a kitchen backsplash. It is one of the hardest soft stones you may use and can create a genuine and elegant atmosphere that only natural stones can.
Natural stone has a high degree of porosity, so sealing it once a year can prevent grease and oil spills and increase its longevity. One of the disadvantages to taking this into account is this. However, even with these few downsides, you will undoubtedly profit more from limestone backsplash kitchen designs if you consider the advantages and disadvantages.
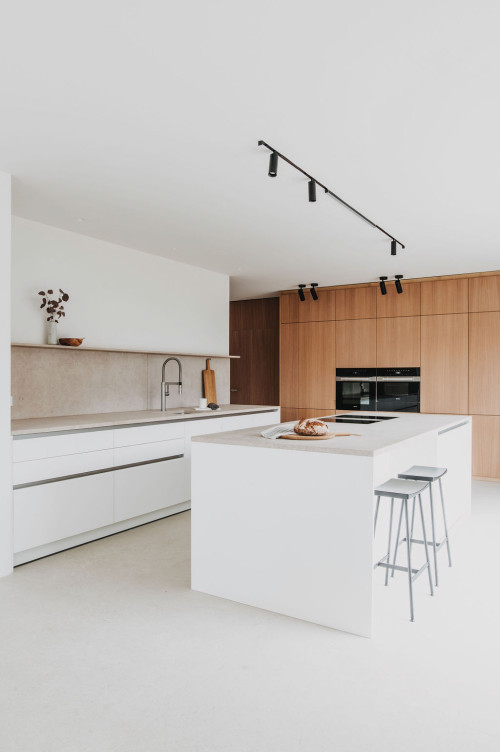
ID# 137004 | Houzz.com – Credit | © Studio17B
White and Wood Flat-Panel Kitchen Cabinets for a Contemporary Kitchen Design
The seamless look of the kitchen is accentuated by the black accents that provide a contrast to the white flat-panel cabinets, island, and beige floors. The neutral color of the limestone backsplash, countertops, and wooden cabinetry design reduce the stark white and cold look of the contemporary design style kitchen. The wooden cabinetry provides a warm appeal harmonizing with the limestone countertops and backsplash.
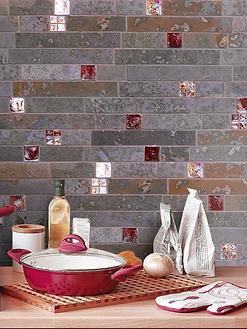
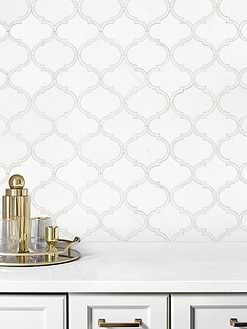
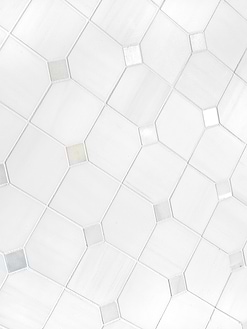
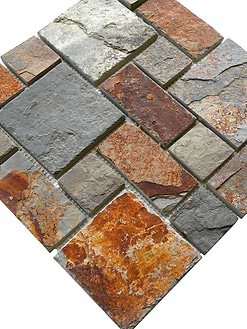
Natural Stone Mosaic Tiles

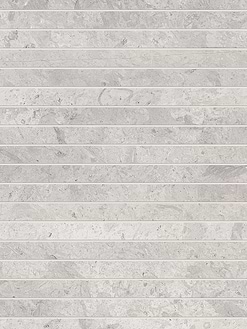
Gray Limestone Backsplash
Are you considering adding a gray limestone backsplash to your kitchen? Excellent choice, first and foremost. They provide character and beauty to any kitchen and are both attractive and timeless. Depending on your tastes and the layout of your kitchen, there are many different types of stone available for backsplashes. Gray limestone backsplashes are not only aesthetically pleasing but also long-lasting, and with the right maintenance, you can keep them looking fantastic for years.
When looking for a backsplash that will give your kitchen a distinctive style, it’s simple to feel a little—or a lot—overwhelmed by all the alternatives. Fortunately, a gray limestone backsplash can never go wrong. Nothing beats real stone for a return on investment when it comes to a new kitchen in terms of increasing the value of your house. There is a style, color, and kind of stone to fit any kitchen, and limestone’s neutral, enduring aesthetic is here to stay.
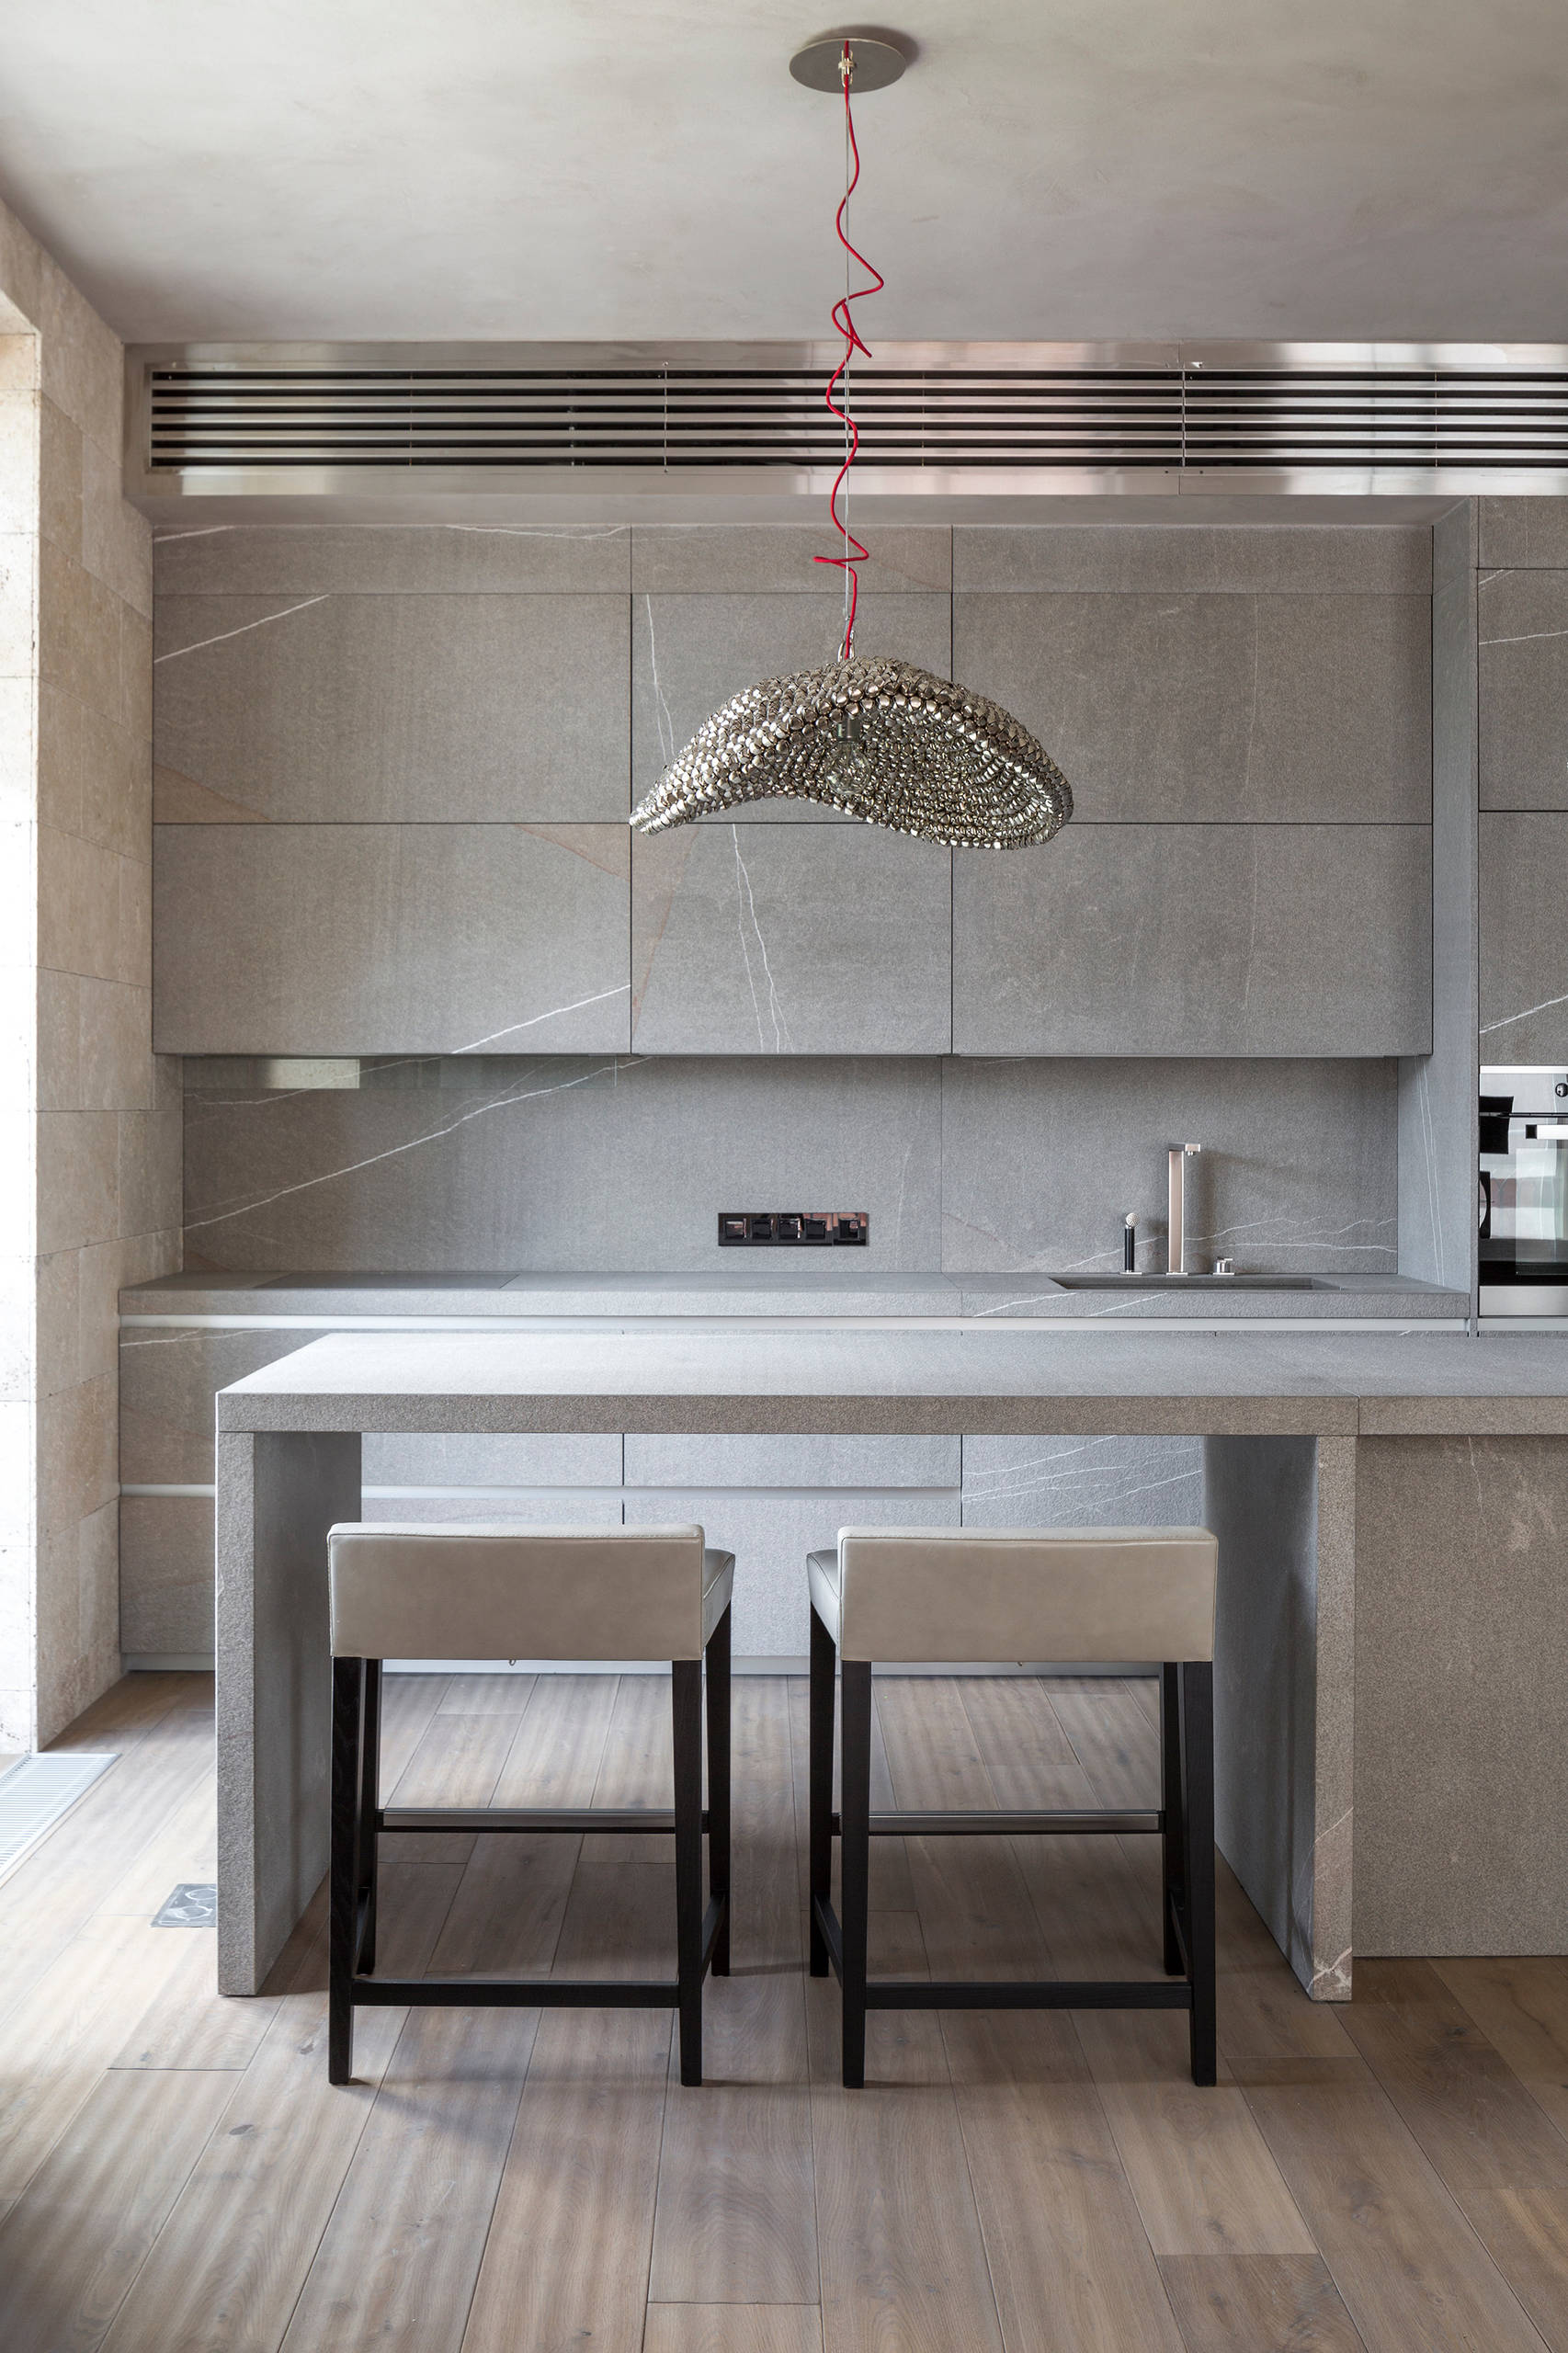
ID# 137005 | Houzz.com – Credit | © Nina Zaytseva
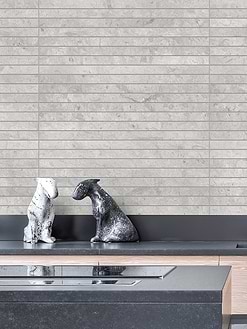
Modern and Industrial Mix with a Gray Limestone Backsplash
The seamless look of the gray flat-panel kitchen cabinets and the gray limestone backsplash design harmonize perfectly! The flawless look of the kitchen cabinetry design is modernized by the stainless steel appliances and details. The sleek look of the upper cabinets keeps the plain design alive thanks to the handleless cabinetry. The neutral color combination still provides a warm atmosphere.
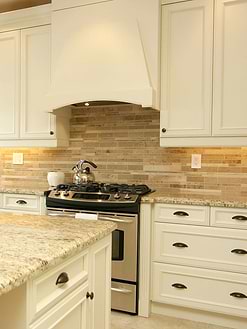
Limestone Subway Tile Backsplash
The title “subway tile” was first popularized in the early 1900s when white-glazed ceramic tiles were utilized extensively throughout New York City’s subway stations. The wall appearance is traditional and rustic since the tiles are shaped like rectangular bricks. In the past, they were composed of glazed ceramic, but nowadays, you may get it from many materials, such as a limestone subway tile backsplash!
A simple variant of limestone subway tile backsplash offers a conventional, understated style that is quite versatile and may be fairly economical. It can also blend in with practically any kitchen design, from the conventional to the cutting-edge. The size and form of limestone subway tiles are generally small to medium. However, grout lines on limestone subway tile backsplashes frequently have debris that can build up over time.
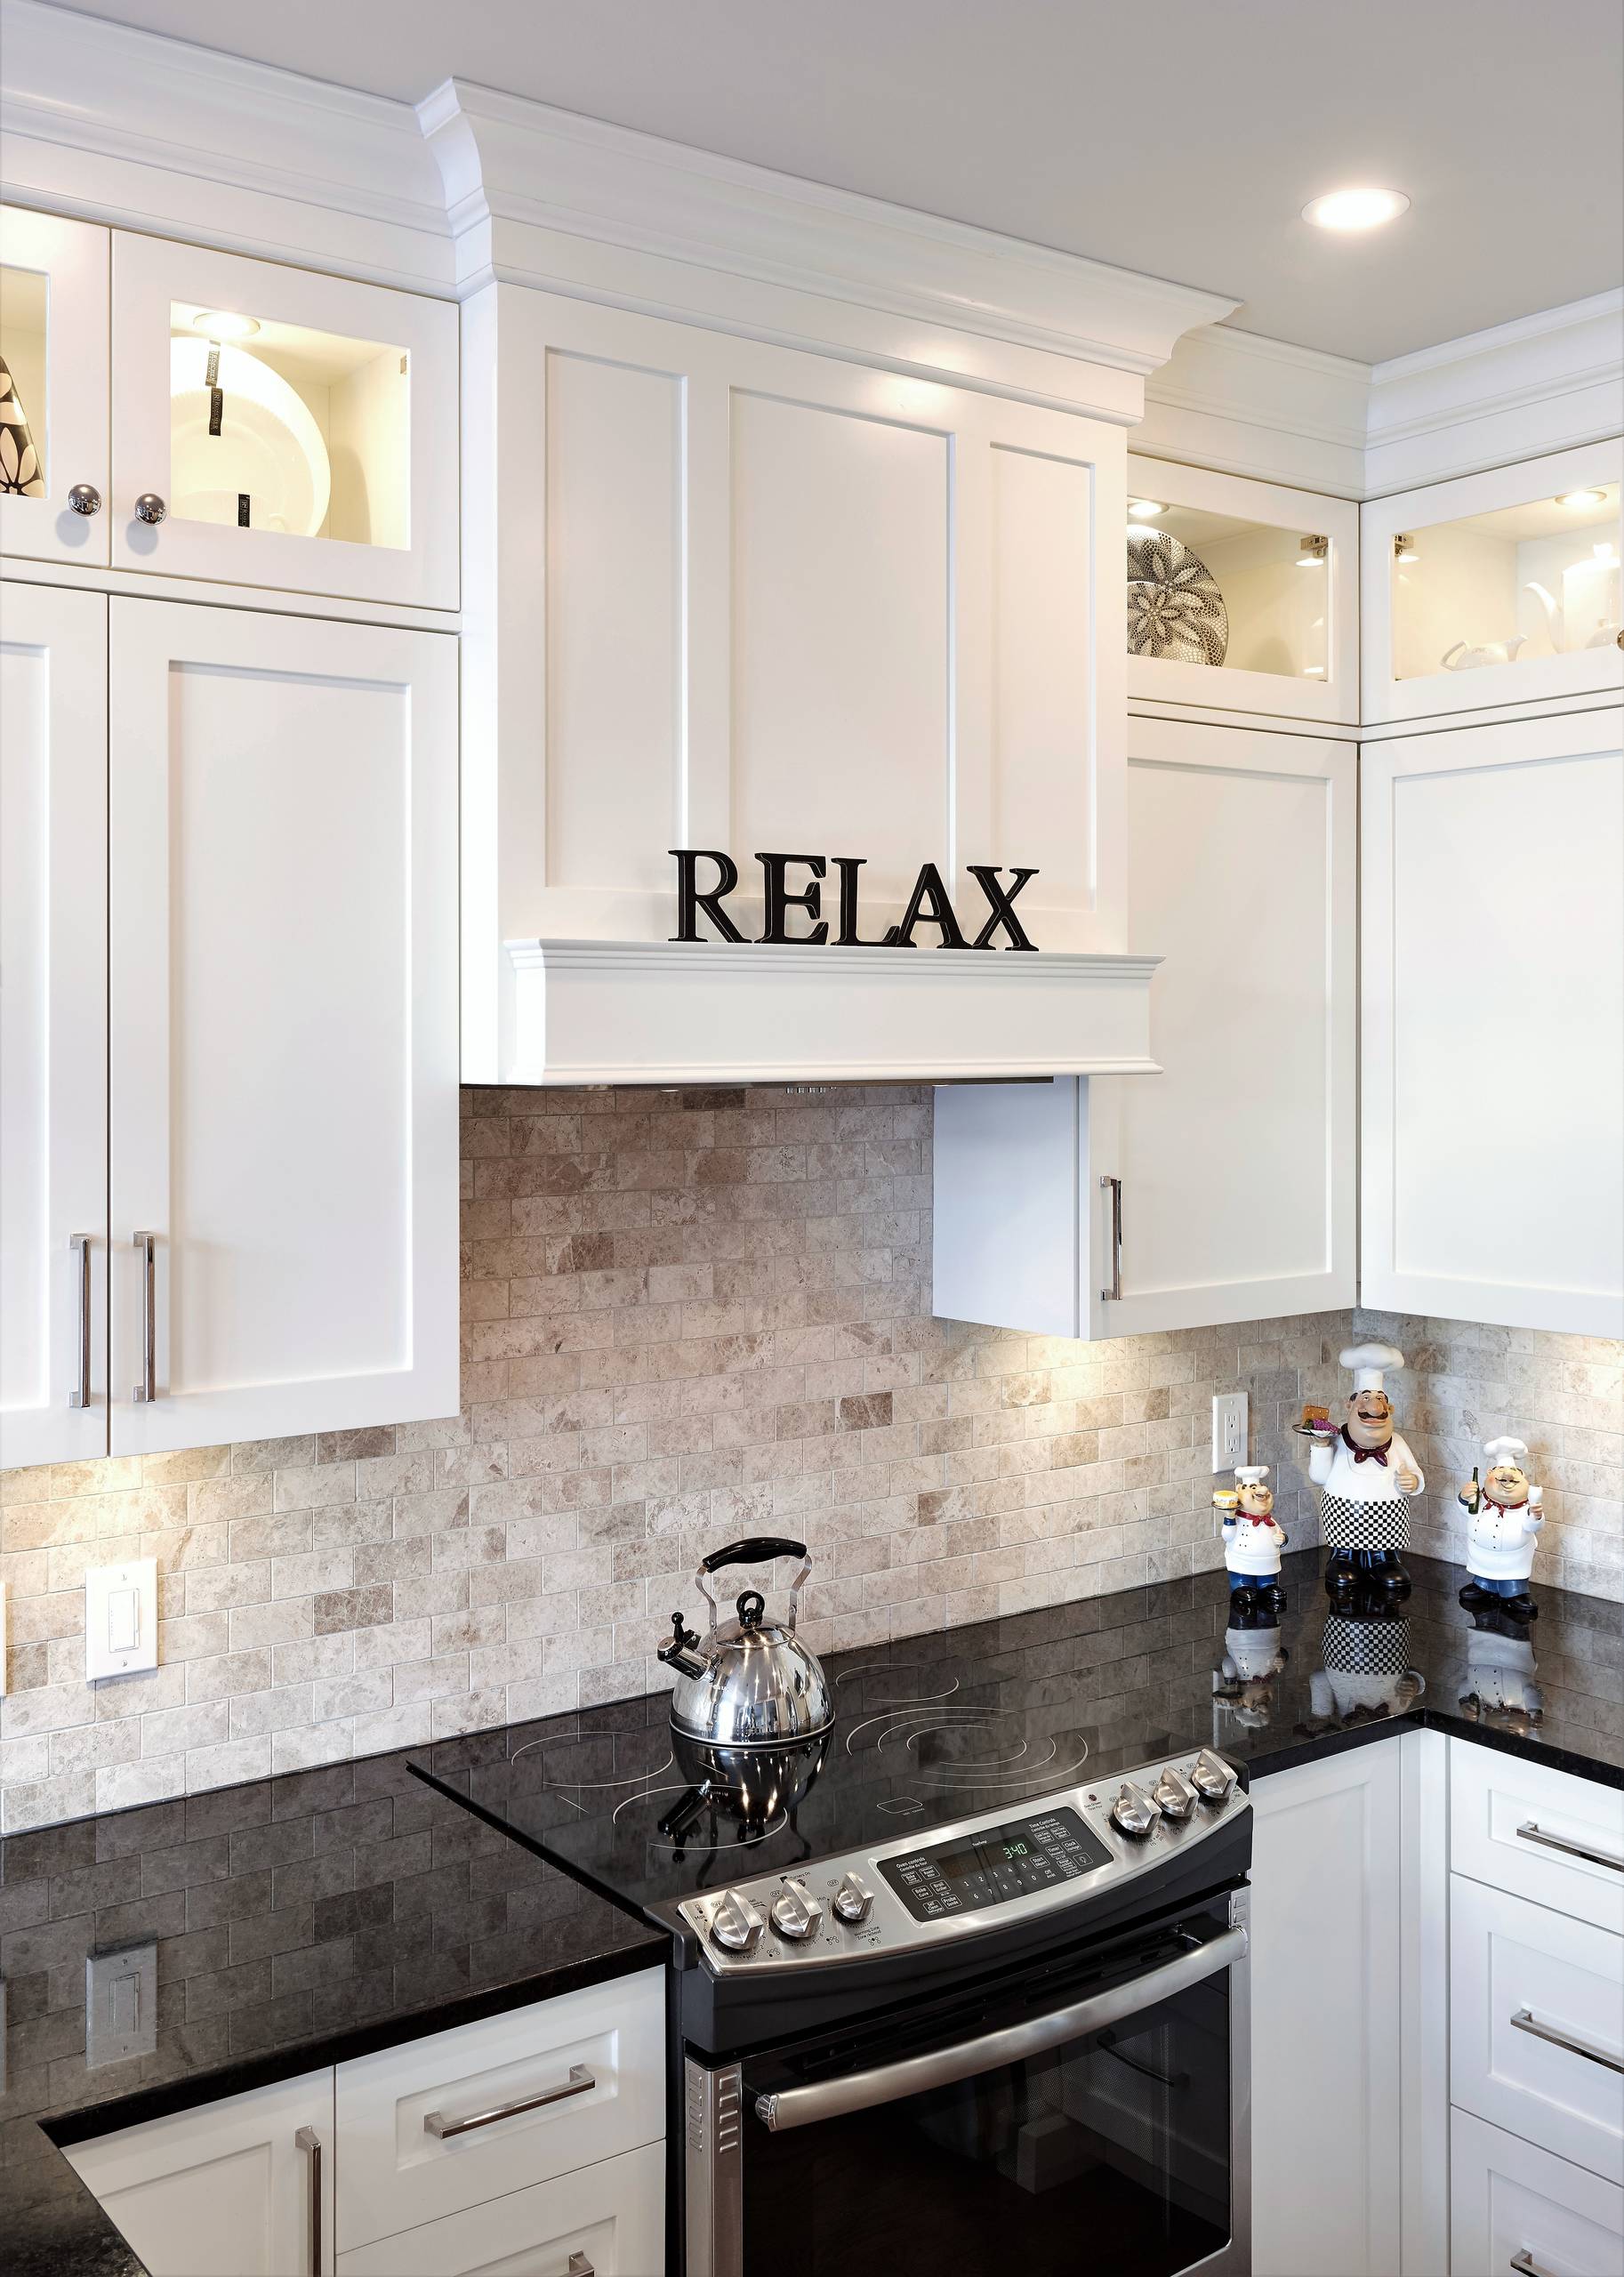
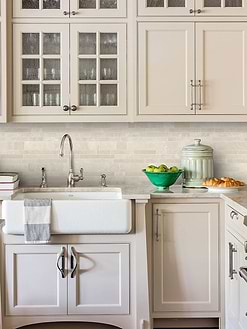
ID# 137006 | Houzz.com – Credit | © House of Fine Carpentry- CABIFY Cabinetry
Transitional Kitchen Design with White Shaker Cabinets and a Limestone Subway Tile Backsplash
The glossy black countertops and the black appliances stand out thanks to the white kitchen cabinetry design. The white shaker cabinets and the black countertops provide a stylish contrast. This contrast is well balanced by the limestone subway tile backsplash. The texture and the natural feeling of the backsplash enhance the warm atmosphere of the kitchen.
How do you seal limestone backsplash?
To seal a limestone backsplash, you will need some equipment and material, such as:
-Several clean cloths
-Stone cleaner
-Sealer
-Foam paintbrush
-Open-mouthed container, large enough to hold the paintbrush
Let’s start:
1-Tiles should be cleaned with stone cleaner applied with a soft cloth. Make certain that there is no oil, food spatter, or surface stains on the tiles. Allow the tiles to thoroughly dry. If the tiles darken after washing, wait until they are back to their original color before sealing so that the water may escape the stone’s pores.
2- In a bowl or other open-mouthed container big enough for your brush to fit inside, pour the stone sealer. Open a window or turn on the kitchen fan to help get rid of some of the potent smells that many sealers contain.
3- Paint the sealer onto the backsplash after dipping a foam paintbrush into the sealant. To avoid drips, use broad, overlapping strokes when painting from top to bottom. Allow the sealant to soak into the stone for ten minutes.
4- To remove the sealer that the stone hasn’t absorbed, buff the surface of the stone tiles with a clean cloth. As soon as the tiles are dry, work rapidly, beginning with the ones you sealed first. Rub in a circular motion. Buff the stone until the tacky feeling is gone if it still feels tacky to the touch.
Is limestone hard to maintain?
Maintaining your limestone backsplash requires routine cleaning to remove harmful oil and debris. As a result, it’s critical to modify your approach to cleaning the limestone backsplash. Regular maintenance merely necessitates wiping the stone’s surface with a moist cloth and warm water, but if you choose to use a cleaner, choose a neutral one since it contains calcium carbonate, which neutralizes acid, which is hazardous and detrimental to the stone.
If oil splashes and food residue are allowed to sit on limestone backsplashes for an extended period, they will harden into stains. Splashes must be quickly cleaned off the tiles, and grout cleaners and stone cleaners must be used for tough stains. You can use the following actions to clean your limestone backsplash:
1-Vacuum:
You may always vacuum the limestone backsplash tiles to remove dirt and grit to reduce damage from abrasive cleaners.
2- Steam:
The microscopic pockets of blackened dust and water that have accumulated in the tiles can be removed by steaming them. The tiles should ideally be steam cleaned regularly.
The tiles may become stained or turn black if tiny pits are left behind by water and soil contamination. Steam can be used to assist solve such issues. After steaming, the tiles need to be dried right away.
3- Mopping wet or Using a Wet Rug:
Every two to three days, use a damp mop and a moderate mix of water and light detergent to clean your limestone backsplashes. When cleaning limestone, gentle cleaners are essential. It can react with acids, potentially harming the stone because it is mostly made of calcium carbonate.
You should use a specialized mop specifically designed for your backsplashes instead of your floor mop while cleaning your backsplashes. Additionally, as spills and splatters are the cause of tile stains, you should rapidly clear away all of them from the limestone tiles.
4- Seal:
Due to its porosity, limestone tiles require sealing regularly—roughly once or twice a year. Natural stone will be shielded by sealing against spills and deterioration over time.
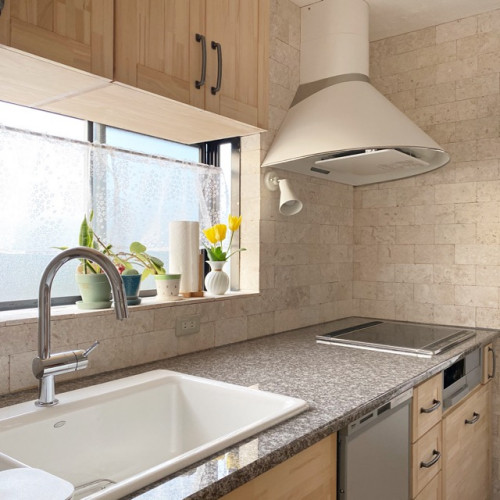
ID# 137007 | Houzz.com – Credit | © 株式会社モスハウス田端
Scandinavian Minimalism with Wood Kitchen Cabinets and Gray Granite Countertops
The simplicity of the kitchen has such a special look thanks to the natural wood kitchen cabinetry design. The gray granite countertops and the cream limestone subway tile backsplash combine the natural wood kitchen cabinetry design providing the ultimate naturality in the kitchen. The minimalistic design of the kitchen cabinetry meets with the Scandinavian charm!
Finish Options for Limestone Backsplash
Unfortunately, problems persist even after choosing a backsplash material. If you want to use limestone for your backsplash design but haven’t made up your mind on the kind of material, color, or tints, then follow these steps: know your options for limestone backsplash finishes. Nearly as crucial as selecting the stone is selecting the limestone finish options. Knowing how each treatment affects the beauty of the limestone and affects how the countertops seem is crucial since it has the power to alter how your room looks and feels.
The finish options for limestone backsplash designs you select will have an impact on the limestone you choose for your new backsplash in terms of both beauty and usefulness. You do have some influence over this one shared location. Ideas for limestone backsplashes come in polished, honed, and tumbled finishes. Let’s check!
Polished Limestone Backsplash
Comparing all possible stone finishes, a polished finish exhibits a stone’s maximum level of brilliance. The polished finish, often referred to as glossy or high glossy, allows you to see every vein and grain on the stone’s surface. This implies that the veining will even be more transparent for limestone tiles. Limestone that has been polished has been sealed on the surface, making the entire piece more durable and less porous. The main disadvantage of selecting a polished limestone backsplash finish is that every scratch and blemish can be seen, whether you want them to be seen or not, due to its smooth and shiny surface.
To get this gloss, many polishing wheels are used in a major and comprehensive smoothing procedure on the natural stone. Limestone is not known for its brilliant luster like marble. On limestone, though, it’s simple to get a polished appearance. By making limestone look brighter, polishing brings out its natural color and contrasts. Mineral oil, a hand polisher, and other techniques can all be used to polish limestone backsplash tiles. However, the majority of polished limestone backsplash tiles are polished mechanically.
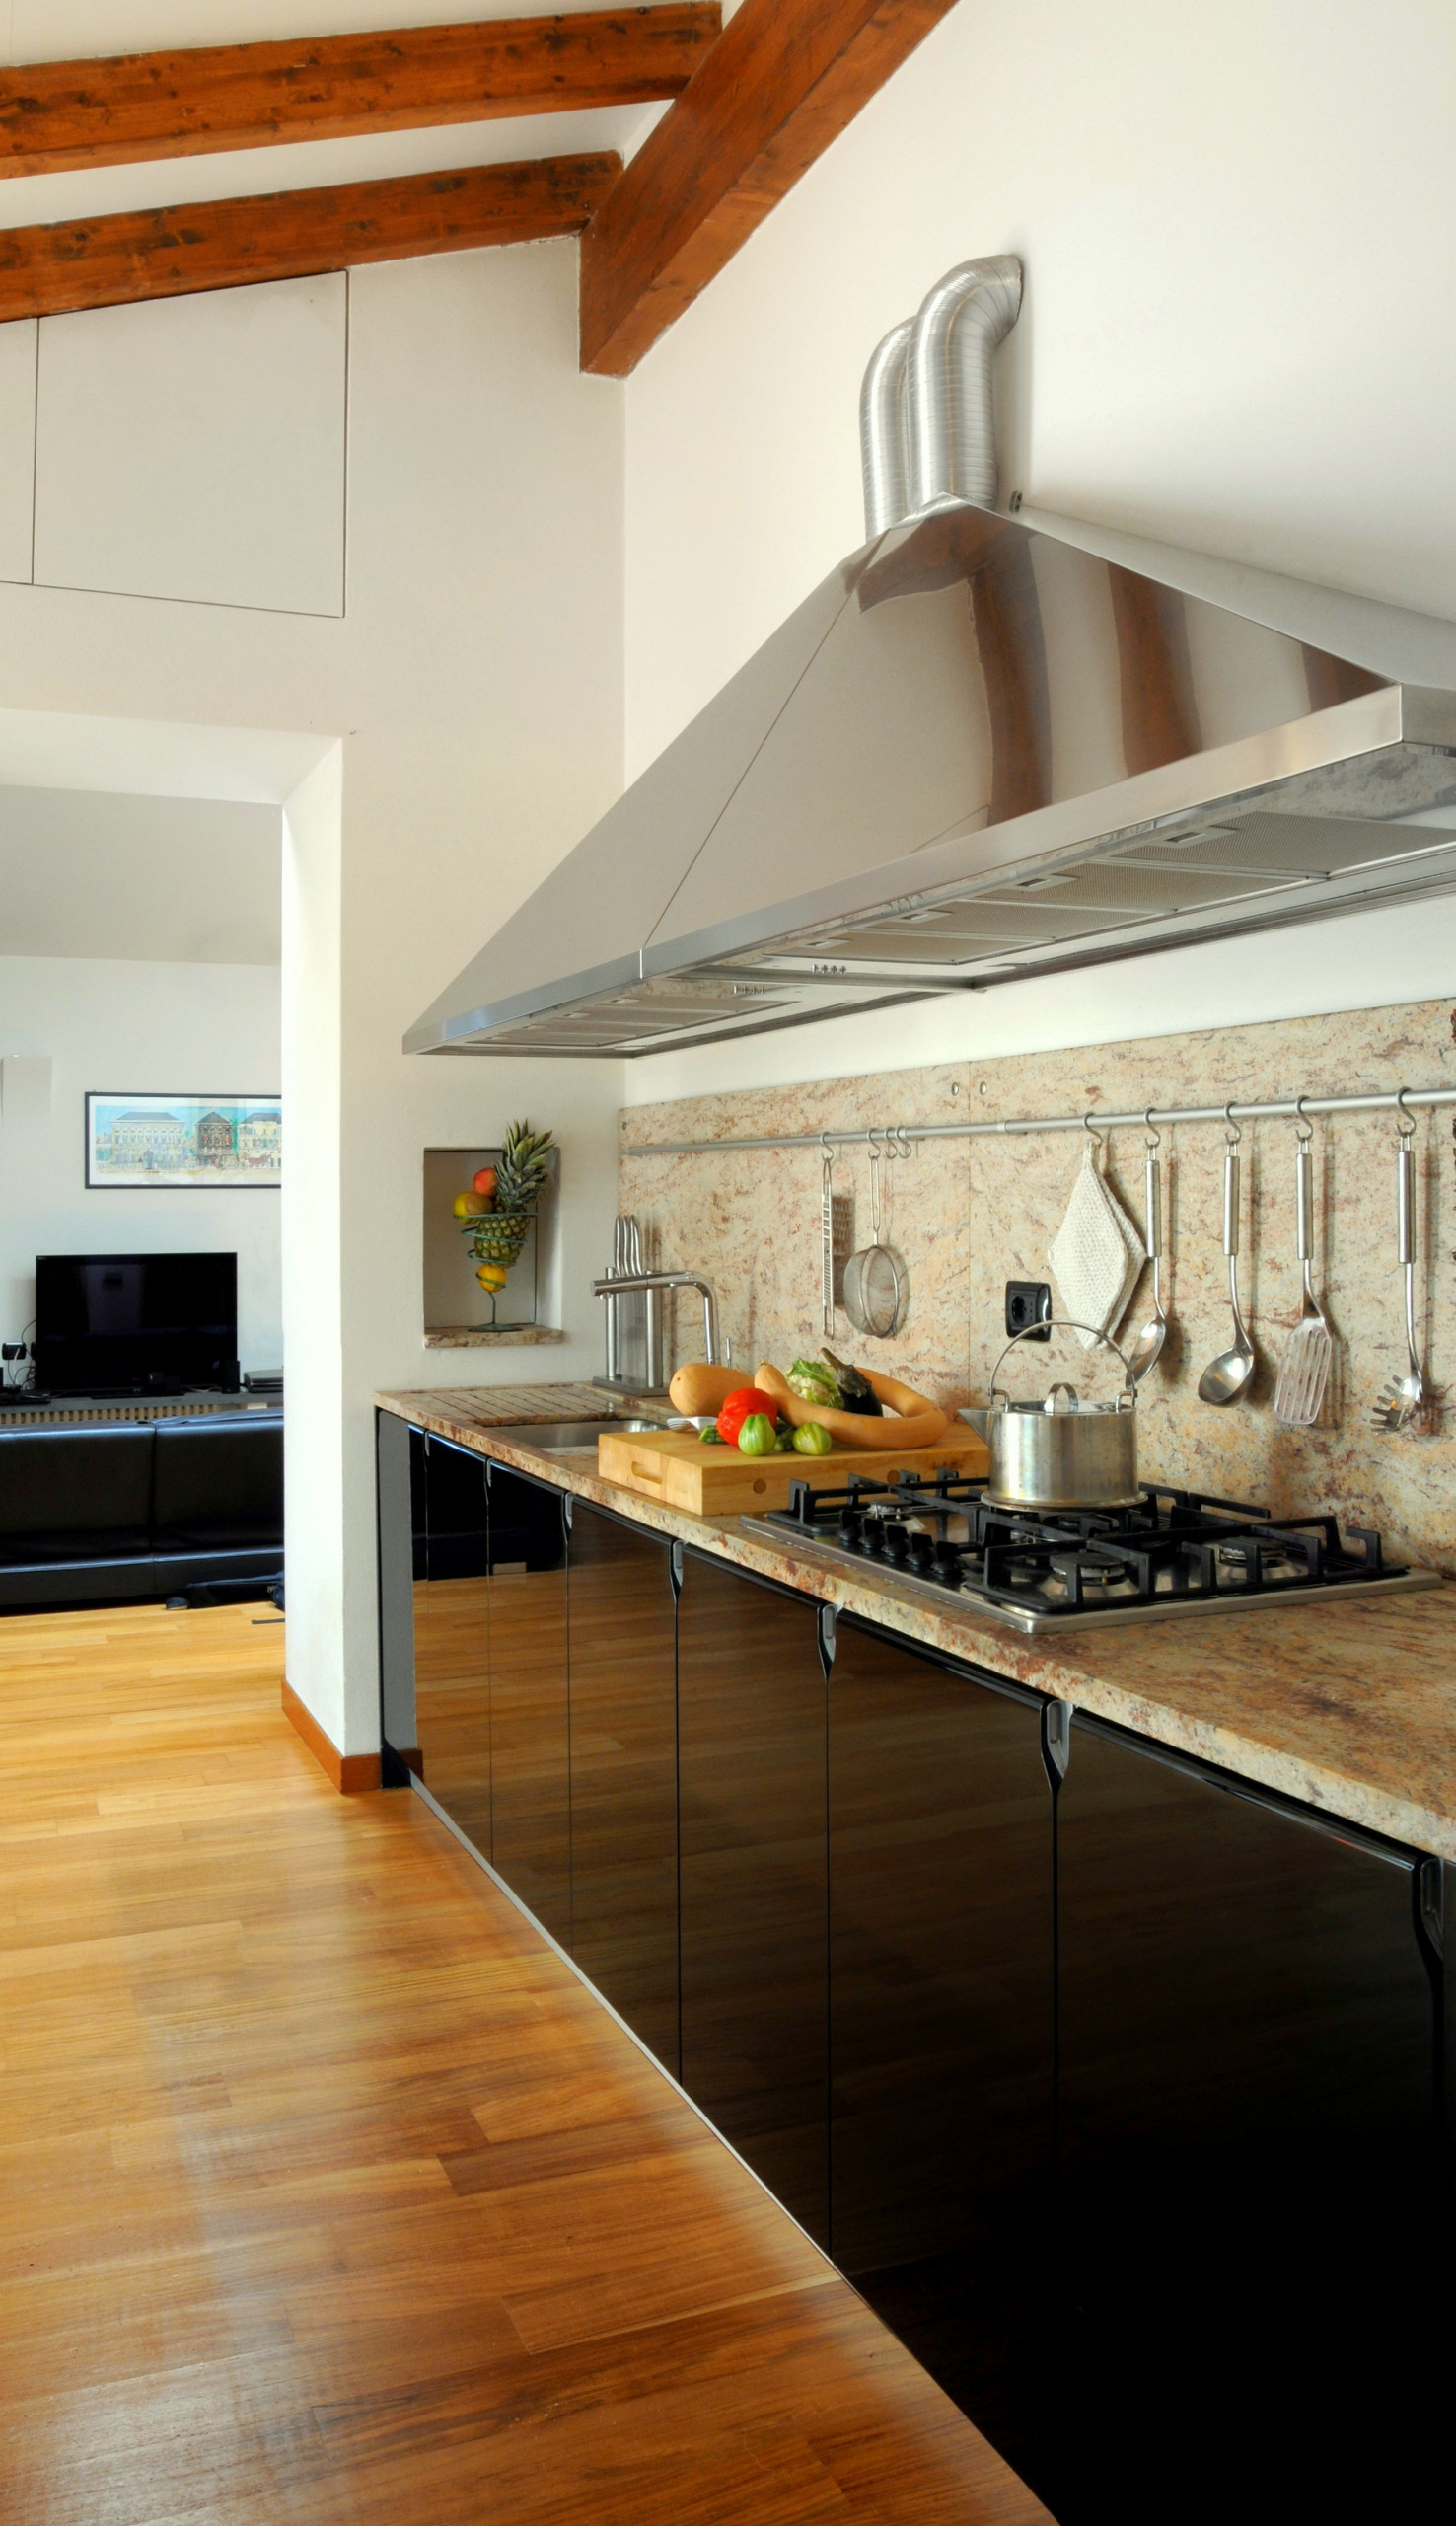
ID# 137008 | Houzz.com – Credit | © Laura Messori
Black Flat-Panel Kitchen Cabinets with a Polished Limestone Backsplash and Countertops
The glossy black kitchen cabinets and the light floors provide contrast and a harmonious appeal. The polished limestone backsplash and the countertops complement the black flat-panel cabinetry harmonizing with the wooden surfaces. The white environment creates a canvas for the kitchen cabinetry design to make it stand out.
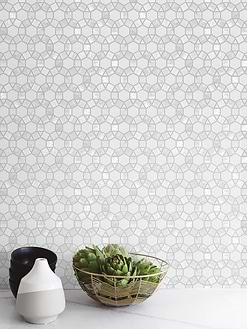
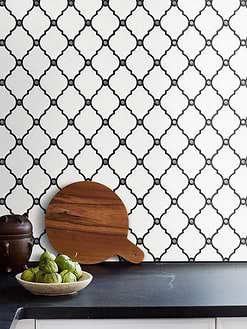
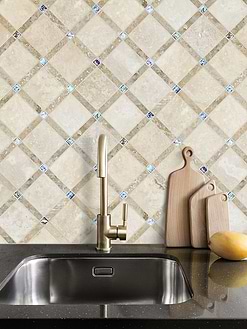
Traditional Mosaic Tiles

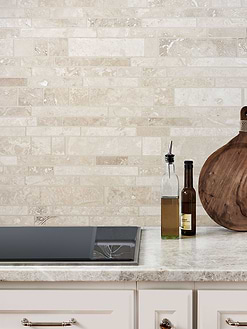
Honed Limestone Backsplash
Choose honed limestone for your backsplash if you want a less smooth finish than satin or polished. It is also known as matte and delivers a subdued look while retaining more texture and authenticity from the genuine stone. It can also conceal little blemishes better than a polished finish. If you’re striving for a more modern and warm appearance, a honed limestone backsplash is a terrific choice and an unusual accent to the kitchen.
The drawback of selecting honed limestone backsplash versus polished limestone is that it leaves some of the stone unprotected. Limestone is porous, so to prevent stains and moisture from penetrating it, you will need to refinish and seal it. In addition, the rough surface makes cleaning it more challenging.
How to clean limestone backsplash?
Having properly sealed the surface, cleaning your limestone backsplash will be simple. You simply need the following items before you begin the daily basic cleaning because it is not as complicated:
-Soft-bristled brush or toothbrush
-Clean rug
-Bucket
-Natural stone cleaner or dish soap
Put some soap and water in your bucket. Either a gentle dish detergent or a pH-neutral cleanser designed particularly for natural stones are options.
You may use the solution to clean your limestone backsplash, particularly the grease and oil splatters, without having to be concerned about damaging the surface. It will help prevent stains from the cleaner’s leaking and splashing if you mix it with water.
Apply the solution liberally to your backsplash after dipping the brush into your soapy water. Start by brushing thoroughly, especially if the backsplash finish you choose is not finished. Spend some time brushing the little crevices you can see.
To remove the soapy solution and rinse it away, get a pail of clean water and a cloth. Don’t overlook any area of the surface, please.
If the stain is difficult to remove, combine some baking soda with some water, then use a spatula to apply the mixture to the stain. After letting it air dry for at least 30 minutes, brush it off. Repeat this procedure and let the mixture soak for a longer period if the discoloration is stubborn.
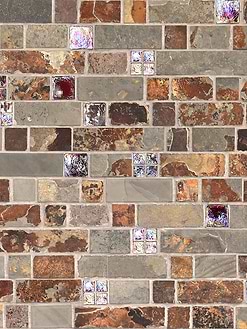
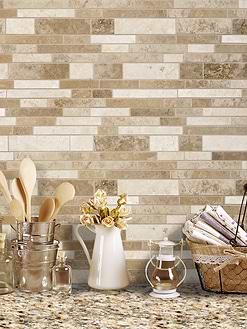
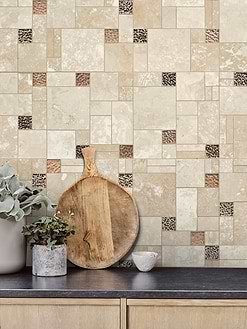
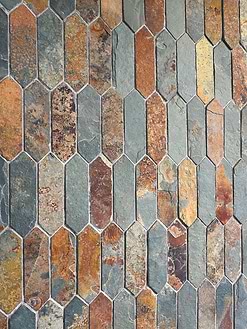
Tumbled Limestone Backsplash
The term “tumbled limestone backsplash” describes when the stone has a rustic surface that exudes an air of antiquity and the ancient world. The procedure used to create the curved edge and soft surface of tumbled limestone backsplash tiles give them an antique-style look. This is one of the elegant kitchen backsplash ideas using limestone. This is accomplished by achieving the rounded appearance that the stones beside the sea also exhibit. A tumbled limestone is rougher since the treatment itself attempts to mimic the “aging” appearance.
Your limestone backsplash is great to have a tumbled texture to provide rustic detail to the space if your kitchen has an old and antique look that is true to its form and design. Additionally, it gives the kitchen personality and may even work as the accent wall for the space. The limestone tiles are put into substantial drums, shaken, then aggregated to get the desired tumbled finish, which has a very “aged” appearance. This type of polish can conceal surface blemishes and marks, making it a fantastic choice for porous stones with visible blemishes. Let’s check some of the great options for tumbled limestone backsplash designs!
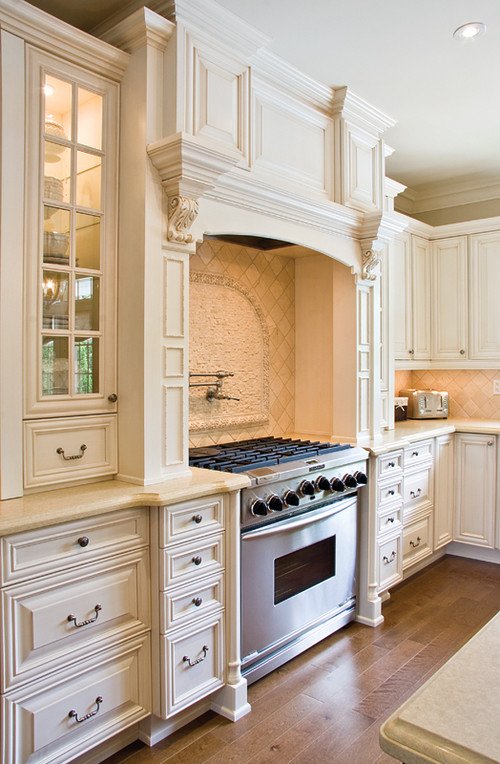
ID# 137010 | Houzz.com – Credit | © AyA Kitchens and Baths
Traditional Kitchen with Off-White Cabinets and a Tumbled Limestone Backsplash
The ornaments and the raised panel kitchen cabinets provide such an elegant look in the kitchen! The stylish combination of the granite countertops and the tumbled limestone backsplash creates a perfect harmony! This harmony softens the stark look and complements the old-world look with an elegant finish. This traditional kitchen can make you feel like you are in a royal family kitchen!
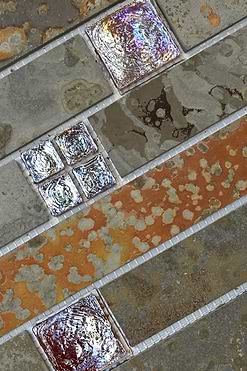
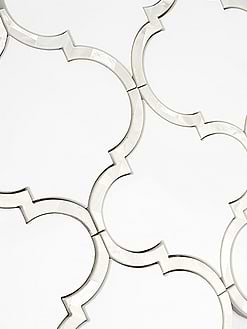
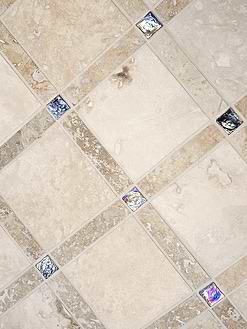
Rustic Mosaic Tiles
How to install limestone backsplash?
Small fossils can be found on the surface of limestone, a soft sedimentary stone. It may be fitted almost any place in the house if it is cut into tiles. Installing limestone tiles is comparable to installing other types of tiles, especially other stone tiles. There must be special caution used to prevent the tiles from collecting color from the mortar and the grout while they are being installed because many limestones are quite porous and can easily be discolored during installation.
– Find the middle line by measuring the area where the limestone will be installed. Mark this line by snapping a chalk line along it.
– The limestone tiles should be spread out either directly on the surface you intend to put them on or in a space of uniform size and shape. To blend the hues of the stone, take tiles from many boxes at once and combine them as you set them down. Place stones with attractive fossils or markings in locations where people are more likely to notice them. Place tiles with unattractive coloring or marks on the installation’s edges if you have the same idea.
Installation
– Beginning at the bottom of the backsplash installation, begin the first row of tiles. To create a balanced installation, place the first tile on the chalk line you established and space the next tiles evenly out to either side. Cut tiles are then placed where people are least likely to see them. To keep the tile lines straight, use tile spacers if necessary.
– On a tile wet saw, trim the limestone to match the installation’s margins. Before you place them, make sure they match with the other tiles in the dry arrangement.
– The limestone tiles should be taken up and placed aside in the reverse order that they were laid up. Over the area where you wish to place the limestone, apply a thin coating of white thin-set mortar with a latex additive. In the pattern you choose during the dry fit, press the tiles into the mortar. For good coverage, position them at a little slant and then twist them into position.
– With a rubber mallet, tap the tiles into the mortar every few rows. Make sure that none of the tile’s edges are higher than the others and that they are all resting flat. If this happens, pound the tile into the mortar even more.
Grouting
– 24 hours after the mortar has dried, seal the limestone before grouting. Use a foam paintbrush to apply the sealant, then wait 10 minutes for it to absorb into the tiles. With a gentle cloth, remove the extra. The sealant serves as a grout release and aids in preventing tile stains from grout.
– Use a grout float to evenly distribute the grout over the tiles and grout joints as you grout the limestone. To pack the grout between the joints, hold the float at a 45-degree angle to the tiles. Use the float’s edge to scrape away any extra grout.
– 10 minutes after the grout has dried, wash the limestone with a grout sponge. When the limestone is thoroughly clean, wring out the sponge well and rub it in a circle over the tiles. Give the grout 24 hours to dry.